3. Software Installation
This page covers the prerequisites and step-by-step installation of the suSSHi Suite components.
Tip
Just want to try out suSSHi quickly for evaluation or testing? See the Quick Start with Docker Compose guide instead.
3.1. Prerequisites
3.1.1. Operating System
suSSHi software ships in the form of multi-arch (x86_64, arm64) Docker containers and should run on all systems that support Docker containers. We recommend updating your system to the latest version along with the latest Docker version to ensure full support of all features bundled in the containers.
3.1.2. Docker Runtime
Docker containers can operate in a variety of different installations, from simple, manual Docker commands enriched with Docker Compose, to highly integrated container platforms like Kubernetes and others.
In this manual, we focus on an installation with Docker Compose and explain, step by step, how to install the individual suSSHi components based on Ubuntu Server 26.04 LTS with Docker installed.
3.1.3. Database
The suSSHi Suite requires a PostgreSQL database to store all configuration data, user accounts, access rules and so on.
While suSSHi Chef, the suSSHi Gateway and suSSHi Proxy are delivered only as Docker containers, the database can be installed as a standard software package on any supported system or as a Docker container.
In the following installation examples, we use a PostgreSQL database container. The container is prepared for easy deployment and grants the specified user full access by default, including the permission to create extensions.
Note
We recommend using the official PostgreSQL Docker image from hub.docker.com.
So if you plan to install a database in a classic package deployment, please use the following steps to prepare the database for suSSHi Chef:
postgres=# CREATE USER chef_production PASSWORD "secret" VALID UNTIL "infinity";
postgres=# CREATE DATABASE chef_production OWNER=chef_production;
postgres=# \c chef_production;
chef_production=# CREATE EXTENSION plpgsql;
chef_production=# CREATE EXTENSION hstore;
chef_production=# CREATE EXTENSION btree_gin;
chef_production=# CREATE EXTENSION pg_trgm;
chef_production=# GRANT ALL PRIVILEGES ON ALL TABLES IN SCHEMA public TO chef_production;
3.2. Docker Containers
For hosting the suSSHi Docker containers, persistent volumes are required to store some small-sized configuration files, the deep inspection session logs and audit trails.
All libraries and dependent software packages required for the suSSHi software are included in the Docker containers, resulting in minimal dependency on the hosting OS.
3.3. suSSHi Docker Registry
suSSHi Docker images can be downloaded from the suSSHi software registry docker.io/wasabielements.
When you are not allowed to directly connect to the internet-hosted registry from the servers where you want to install suSSHi, you can configure Docker to use a proxy server. Learn how here.
If using a proxy server is not an option due to security policies or other restrictions, you can download the suSSHi software from the official suSSHi software registry and copy it into your company’s internal private registry to use it from there.
3.3.1. Docker Images
The Docker images on our private registry docker.io/wasabielements are named according to the following conventions:
Content |
Path |
|---|---|
suSSHi Chef |
|
suSSHi Gateway |
|
suSSHi Proxy |
|
3.4. Installation
3.4.1. Preparation
Linux Preparation
For the sake of simplicity, we use the superuser (root) for all steps of this example installation.
In a production setup, you would perform some steps with an unprivileged user, depending on your requirements.
For the same reason, this tutorial installs all suSSHi components on a single server. We recommend operating the components on separate servers in production, or at least running suSSHi Gateway separately from suSSHi Chef and the suSSHi Chef database.
Please install the latest Ubuntu 26.04 LTS server image on a virtual server or hardware with sufficient disk space and CPU / RAM resources and install Docker.
Note
In this tutorial we install docker-ce, the certified release provided by docker.com.
It includes Docker Compose as a built-in plugin (docker compose).
$ apt-get update && apt-get upgrade
$ curl -fsSL https://get.docker.com | sh
For detailed installation instructions, see the Docker documentation.
To keep the individual suSSHi components isolated from each other — for example to apply separate firewall rules per component or to keep their network traffic clearly distinguishable — we run suSSHi Chef and suSSHi Gateway on their own dedicated IP addresses instead of sharing a single one with the Docker host.
In our example, we use netplan to configure two additional IP addresses used for suSSHi Chef and suSSHi Gateway:
192.168.20.51 docker-host
192.168.20.52 susshi-chef
192.168.20.53 susshi-gateway
Additionally we use the following local DNS servers:
192.168.15.11
192.168.15.12
It is not necessary to run the services on different IP addresses, but please note that other services (such as the SSH
daemon) may already be bound to the server.
At the time of writing, OpenSSH server shipped with Ubuntu listens on all local addresses by default.
Therefore, you might want to change this setting in /etc/ssh/sshd_config:
ListenAddress 192.168.20.51
Please prepare /etc/netplan/50-cloud-init.yaml and /etc/hosts and adjust all IP addresses and the interface
name according to your setup.
In the Docker Compose configuration, we will reference these IP addresses later.
network:
    ethernets:
        ens160:
            addresses:
              - 192.168.20.51/24
              - 192.168.20.52/24
              - 192.168.20.53/24
            gateway4: 192.168.20.1
            nameservers:
                addresses:
                  - 192.168.15.11
                  - 192.168.15.12
                search:
                  - lab.example.org
            optional: true
    version: 2
192.168.20.51      <server-name>
192.168.20.52      susshi-chef
192.168.20.53      susshi-gateway
Please run netplan apply or reboot the server to apply the changes in the cloud-init configuration.
3.4.2. Persistent Data
All data inside a container is non-persistent and will be lost if you recreate the container. Therefore, it is important to store all data that should survive the container being recreated outside of the container. This is what persistent volumes are for.
There are several ways to provide persistent volumes to Docker containers running on a Docker host. One simple option is to use bind mappings from directories that exist on the Docker host into containers. Another option is to create named volumes and map them into the containers.
In this sample installation, we use bind mappings to simplify the example a bit.
Directory Structure
We will utilize the following directory structure:
Path
Description
/opt/wasabi/docker
Location of the
compose.yamlfile./opt/wasabi/susshi-chef/log
Location of the suSSHi Chef Logs.
/opt/wasabi/susshi-chef-db/data
suSSHi Chef Database (PostgreSQL) data directory.
/var/log/susshi
Location of the suSSHi Gateway Logs.
Please create a base directory where we will create some subdirectories later:
$ mkdir -p /opt/wasabi
$ mkdir -p /var/log/susshi
3.4.3. Docker Compose
All Docker Compose configuration is stored in one single file named compose.yaml.
To make the installation a bit clearer, we use environment variables set in a second file named .env
in the same directory as compose.yaml.
$ cd /opt/wasabi
$ mkdir docker
Please prepare the .env file with the corresponding values and adjust the placeholders to your preferred /
currently available version:
BASEDIR=/opt/wasabi
IP_CHEF=192.168.20.52
IP_GATEWAY=192.168.20.53
DB_SERVER=susshi-chef-db
DB_DATABASE=chef_production
DB_USERNAME=chef_production
DB_PASSWORD=<secure_password>
RELEASE_DB=<release_db>
RELEASE_CHEF=<release_chef>
RELEASE_GATEWAY=<release_gateway>
SUSSHI_CHEF_URL=<susshi_chef_url>
CHEF_MASTER_KEY=<chech_master_key>
Note
DB_PASSWORD and CHEF_MASTER_KEY are not filled in for you and must be generated yourself.
You can create suitable random values with openssl:
$ openssl rand -hex 16   # DB_PASSWORD
$ openssl rand -hex 32   # CHEF_MASTER_KEY
Replace the placeholders in the .env file with the generated values before continuing.
Next, we will see how we can spin up the required containers one after another.
3.4.3.1. suSSHi Chef Database
In the first step we will use docker compose to create a Postgres database container.
Please fill the compose.yaml file with the following content:
version: '3.5'
services:

  susshi-chef-db:
    container_name: 'susshi-chef-db'
    image: 'postgres:${RELEASE_DB}'
    command: 'postgres'
    restart: unless-stopped
    environment:
      - POSTGRES_DB=${DB_DATABASE}
      - POSTGRES_USER=${DB_USERNAME}
      - POSTGRES_PASSWORD=${DB_PASSWORD}
    volumes:
      - ${BASEDIR}/susshi-chef-db/data:/var/lib/postgresql
Note
The target directory of the volume mount for the PostgreSQL data directory may depend on the PostgreSQL version in use. In this tutorial, we use PostgreSQL version 18.
Let’s see if this works:
$ docker compose up
This should initiate the download and start a shiny new and unused PostgreSQL database container from hub.docker.com.
If all goes well, you should see some log messages and not return to the console.
If you have checked all the logs and nothing looks weird, you can stop the container for now by pressing CTRL + C and proceed with the next step.
3.4.3.2. suSSHi Chef
In this step, we will add the susshi-chef service to our compose.yaml file:
  susshi-chef:
    container_name: 'susshi-chef'
    image: "docker.io/wasabielements/susshi-chef:${RELEASE_CHEF}"
    restart: unless-stopped
    environment:
      - DB_SERVER=${DB_SERVER}
      - DB_DATABASE=${DB_DATABASE}
      - DB_USERNAME=${DB_USERNAME}
      - DB_PASSWORD=${DB_PASSWORD}
      - CHEF_MASTER_KEY=${CHEF_MASTER_KEY}
    ports:
      - "${IP_CHEF}:443:443"
      - "${IP_CHEF}:6514:6514"
      - "${IP_CHEF}:8443:8443"
      # This is optional if you like to do suSSHi Chef a redirect to HTTPS when accessed on HTTP:
      - "${IP_CHEF}:80:80"
    depends_on:
      - susshi-chef-db
    volumes:
      - ${BASEDIR}/susshi-chef/logs/nginx:/opt/wasabi/susshi-chef/log/nginx
Next, you can run docker compose up again to see what happens:
$ docker compose up
You should see how suSSHi Chef initializes the database and starts the suSSHi Chef WebUI.
If everything goes well so far, we should be able to run suSSHi Chef and the database in the background from now on.
So please stop Docker Compose by hitting CTRL + C and restart Docker Compose with the detach mode flag
-d:
$ docker compose up -d
You should now be able to access suSSHi Chef with your browser on https://192.168.20.52 (or the corresponding DNS
entry you’ve already made).
suSSHi Chef installs a self-signed certificate to provide HTTPS access.
A certificate signed by your own or an official CA can be installed later.
Try to log in with the default user admin and the initial password ChangeMe&1234.

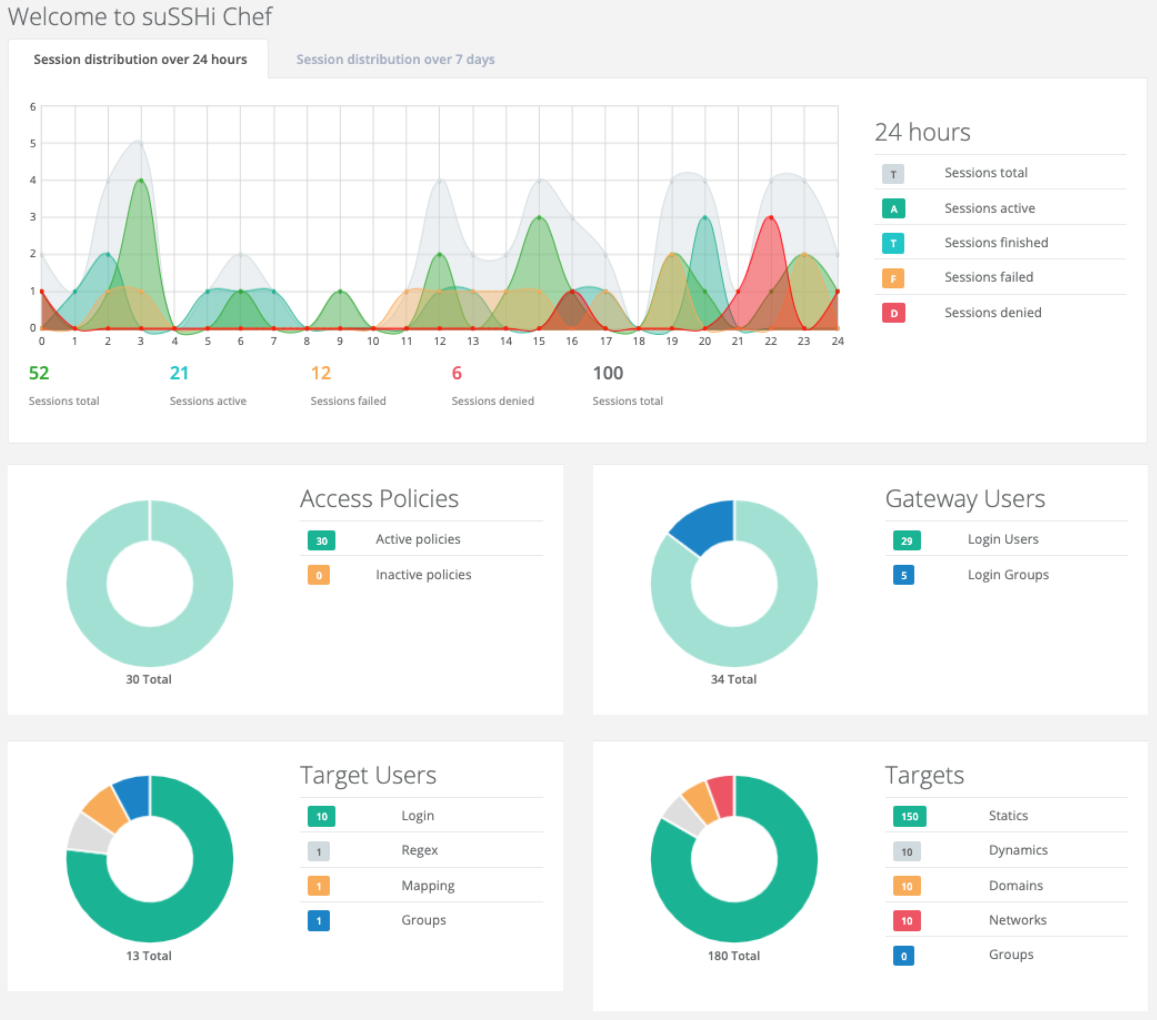
After logging in, you will land on the Overview Dashboard. Since no subscription has been added yet, the top navigation bar will show No Subscription.
3.4.3.2.1. Subscription EE
By default, suSSHi Chef runs without an active subscription and only exposes the built-in Free/Libre Open Source Software (FLOSS) features. Once you have purchased a suSSHi Chef Enterprise Edition subscription, Wasabi Elements will provide you with a subscription key.
Open Dashboard > Subscription, enter the subscription key and press Activate Online Subscription. suSSHi Chef fetches the subscription, enables the Enterprise features immediately and renews the subscription automatically from then on. This requires an outbound HTTPS connection from the suSSHi Chef container.
Note
Air-gapped installations without an outbound internet connection receive a signed subscription token file
(subscription.token) from suSSHi support instead, which is mounted into the container as a Docker secret.
You can review the status of your subscription at any time under Dashboard > Subscription. Please refer to the Subscription section for the activation with a subscription key, air-gapped installations, automatic renewal and troubleshooting.
3.4.3.3. suSSHi Gateway
In the last step we fire up a gateway and register it with suSSHi Chef.
Append the following content to
compose.yaml:compose.yaml (add)susshi: container_name: 'susshi' image: "docker.io/wasabielements/susshi:${RELEASE_GATEWAY}" restart: unless-stopped environment: - SUSSHI_CHEF_URL=${SUSSHI_CHEF_URL} volumes: - ${BASEDIR}/susshi/logs:/var/log/susshi ports: - "${IP_GATEWAY}:22:22" depends_on: - susshi-chef
Switch to the suSSHi Chef UI to add a new Gateway
Navigate to Partition > Gateways > New and enter a hostname (for now we name it
susshi-gateway) and pressCreate.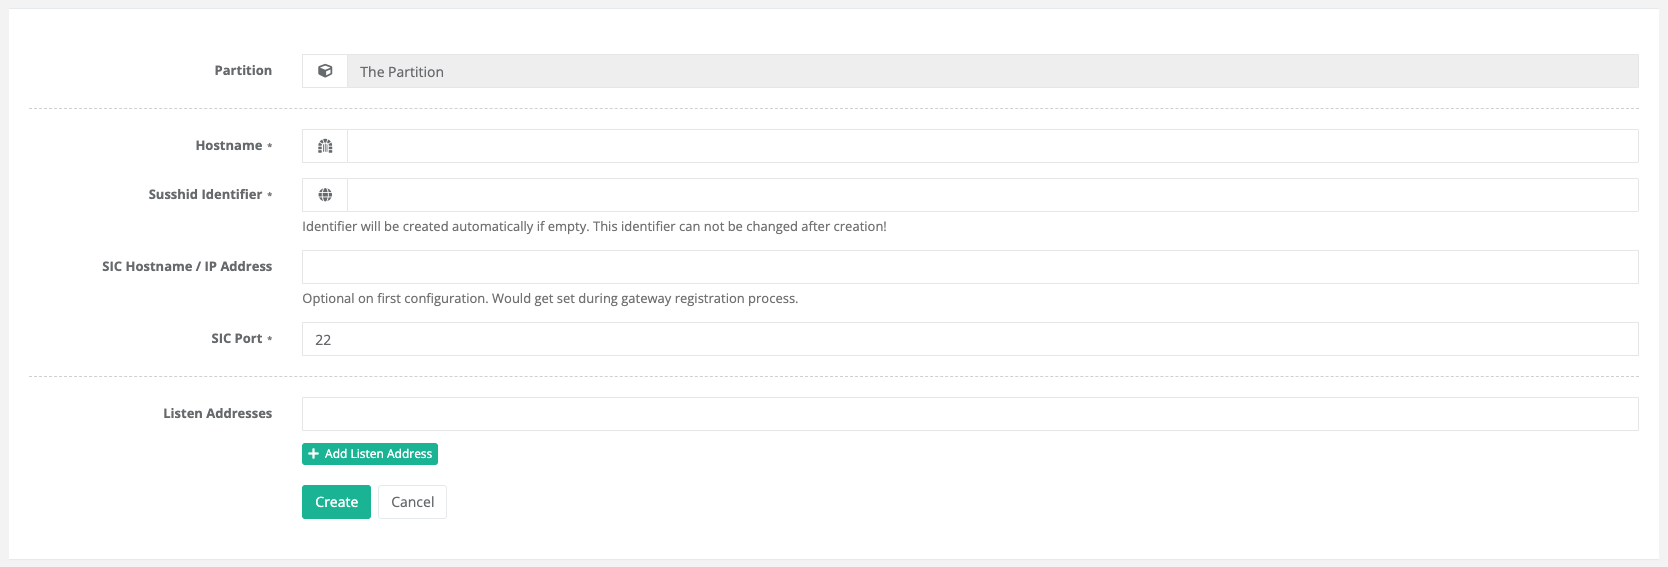
From the following overview page, copy the highlighted URL.
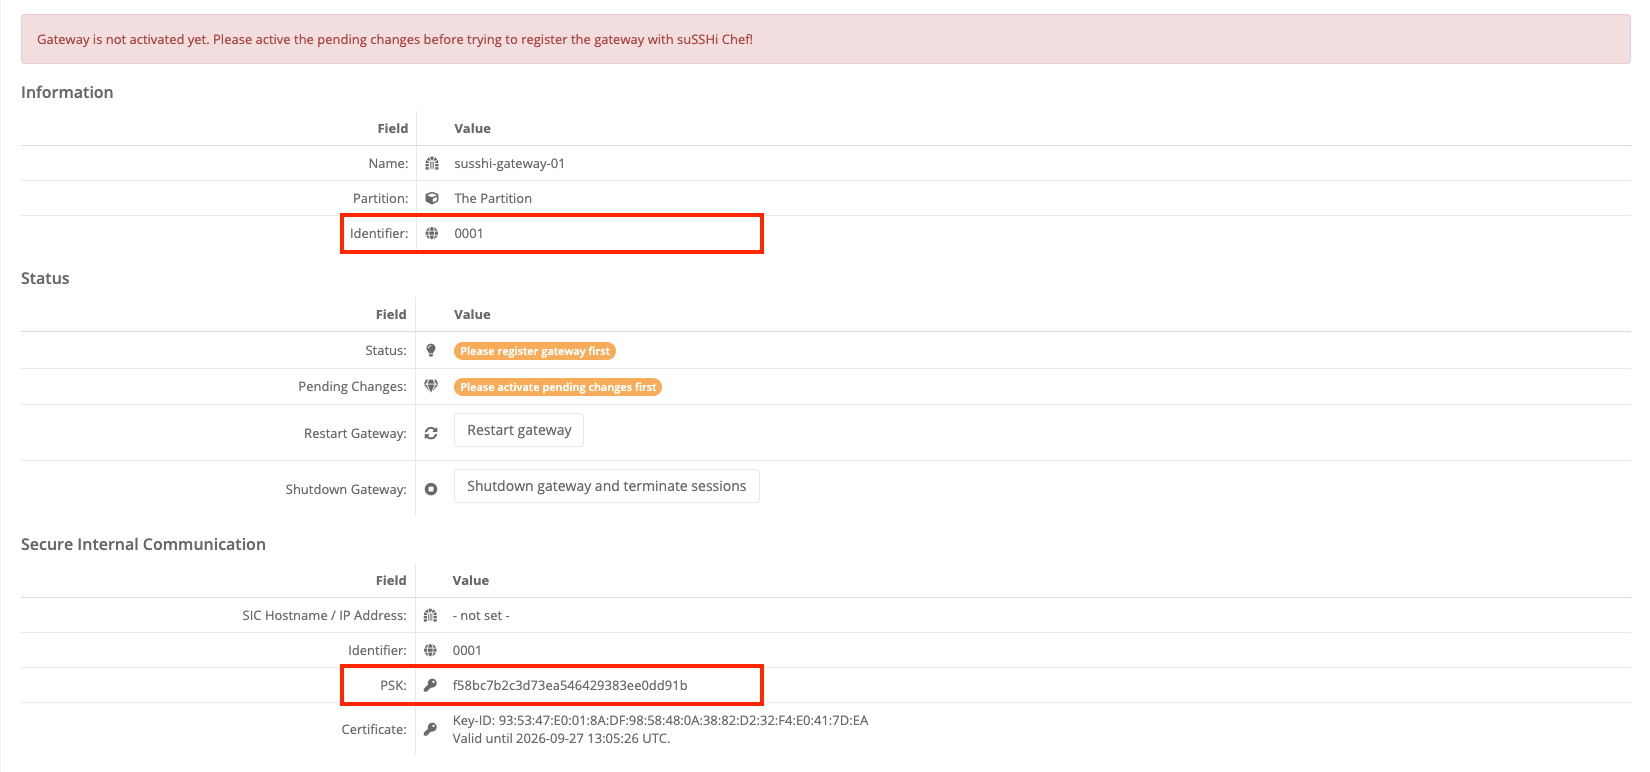
Paste the copied value into the
.envfile as the value forSUSSHI_CHEF_URL.Run the suSSHi Gateway
Now we are ready to start the suSSHi Gateway. The gateway will automatically connect to suSSHi Chef using the
SUSSHI_CHEF_URL, initialize the secure internal communication and download the configuration.$ docker compose up -d
Navigate to Partition > Gateways to verify the status of the suSSHi Gateway.
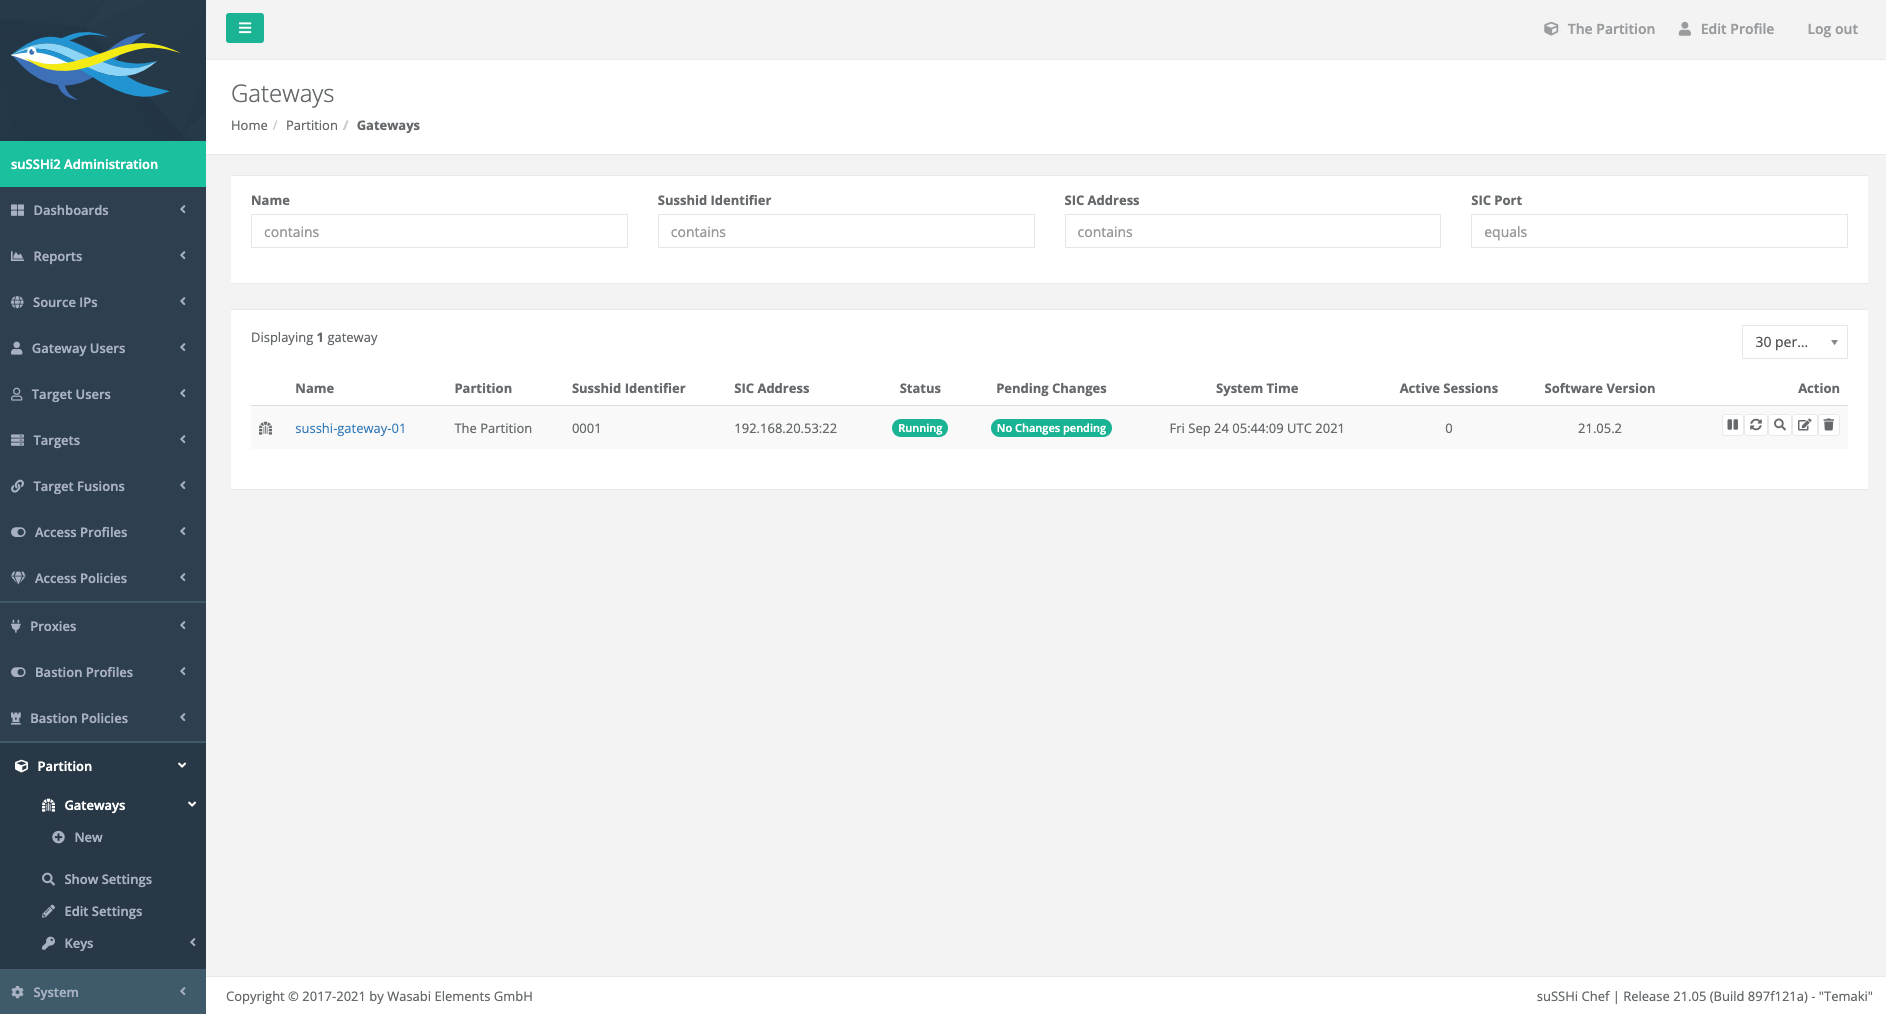
The status should be
RunningandNo Changes Pending.
Tip
Download compose.yaml for reference.
3.5. Updates
Updating the software is quite easy due to the container architecture, because basically only the existing container image reference has to be replaced by a newer version. Please always refer to the Release Notes to find out from which previous container versions an upgrade path exists.
In general, the different versions of suSSHi Chef, suSSHi Gateway and suSSHi Proxy are backward compatible with each other, so that an update can be done step-by-step and possible redundancies can be considered.
3.5.1. suSSHi Chef
It is generally recommended to always upgrade the suSSHi Chef container first. Please note that when upgrading the version of the suSSHi Chef container, changes are often made to the database, so-called database migrations. As a consequence, additional suSSHi Chef instances that access the same database but still run older versions may not work correctly. If there are several suSSHi Chef instances, it is recommended to update them together.
It is also recommended to make regular backups of the database. If there are problems updating the suSSHi Chef container, the system will try to automatically roll back the database migrations to the original state, but if this fails for some reason, it is good to have a backup!
Updating to a newer version can easily be done by rewriting the referenced image in the .env file (RELEASE_CHEF)
to a newer version and calling docker compose up -d, which loads the new image and recreates the container
with that image.
3.5.2. suSSHi Gateway
Updating suSSHi Gateway is the easiest due to the low dependencies.
Again, updating to a newer version can easily be done by rewriting the referenced image in the .env file
(RELEASE_GATEWAY) to a newer version and calling docker compose up -d, which loads the new image and
recreates the container with that image.
3.5.3. suSSHi Proxy EE
Updating the suSSHi Proxy is also very simple because there are no direct dependencies on other services.
Just replace the referenced image with a newer version or, if you used the latest tag, run a
docker pull <image>:latest to get an updated image with the same tag.