Quick Start with Docker Compose
This page shows the fastest way to try out the suSSHi Suite on a single Docker host. It is intended for evaluation and testing only.
Warning
This setup is not intended for production use. It uses a throwaway database without persistence, self-signed certificates, and a single host with no redundancy or high availability. For a production-ready setup, please refer to Software Installation.
Prerequisites
You only need a single host with Docker and the Docker Compose plugin installed. No external database, DNS setup, or additional network configuration is required.
Prepare the Environment
Create a new directory for this setup, for example susshi-suite:
$ mkdir susshi-suite
$ cd susshi-suite
Inside this directory, create a .env file with the following content:
SUSSHI_CHEF_VERSION=latest
SUSSHI_VERSION=latest
POSTGRES_VERSION=latest

DB_DATABASE=chef_production
DB_USERNAME=chef_production
DB_PASSWORD=<secure_password>

CHEF_MASTER_KEY=<secure_master_key>

SUSSHI_CHEF_URL=<susshi_chef_url>
Note
DB_PASSWORD and CHEF_MASTER_KEY are not filled in for you and must be generated yourself.
You can create suitable random values with openssl:
$ openssl rand -hex 16   # DB_PASSWORD
$ openssl rand -hex 32   # CHEF_MASTER_KEY
Replace the placeholders in the .env file with the generated values before continuing.
SUSSHI_CHEF_URL is not yet known at this point either, since it is only generated once a gateway has been
registered in suSSHi Chef.
Leave it as a placeholder for now — the next steps will show you how to obtain it.
Create the Compose File
In the same directory, create a compose.yaml file with the following content:
services:
  susshi-chef-db:
    container_name: 'susshi-chef-db'
    image: "postgres:${POSTGRES_VERSION:-18}"
    command: 'postgres'
    restart: unless-stopped
    environment:
      - POSTGRES_DB=${DB_DATABASE}
      - POSTGRES_USER=${DB_USERNAME}
      - POSTGRES_PASSWORD=${DB_PASSWORD}
    volumes:
      - susshi-chef-db:/var/lib/postgresql
    healthcheck:
      test: ["CMD-SHELL", "pg_isready -U $$POSTGRES_USER"]
      start_period: 60s
      start_interval: 3s
      interval: 30s
      timeout: 5s
      retries: 3

  susshi-chef:
    container_name: susshi-chef
    image: "wasabielements/susshi-chef:${SUSSHI_CHEF_VERSION}"
    hostname: susshi-chef
    restart: unless-stopped
    environment:
      - DB_SERVER=susshi-chef-db
      - DB_DATABASE=${DB_DATABASE}
      - DB_USERNAME=${DB_USERNAME}
      - DB_PASSWORD=${DB_PASSWORD}
      - CHEF_MASTER_KEY=${CHEF_MASTER_KEY}
    ports:
      - "8443:443"
    depends_on:
      susshi-chef-db:
        condition: service_healthy

  susshi:
    container_name: susshi
    image: "wasabielements/susshi:${SUSSHI_VERSION}"
    restart: unless-stopped
    hostname: susshi
    environment:
      - SUSSHI_CHEF_URL=${SUSSHI_CHEF_URL}
    ports:
      - "2222:22"
    depends_on:
      susshi-chef:
        condition: service_healthy

volumes:
  susshi-chef-db:
The susshi-chef and susshi container images already provide their own Docker health check, so
depends_on can rely on the service_healthy condition without any extra configuration.
Start suSSHi Chef
Only susshi-chef needs to be started at this point; the susshi gateway service is added once its connection
details are known, in a later step:
$ docker compose up --detach susshi-chef
Since susshi-chef depends on susshi-chef-db, Docker Compose automatically starts the database container as well,
even though it was not named explicitly on the command line.
Compose waits for susshi-chef-db to report as healthy before starting susshi-chef, and --detach runs both
containers in the background so that your terminal stays free.
After a short while, both containers should be up and healthy:
CONTAINER ID   IMAGE                              STATUS                    PORTS                     NAMES
08f2ecc5d2a1   wasabielements/susshi-chef:latest   Up 31 seconds (healthy)   0.0.0.0:8443->443/tcp     susshi-chef
e0b997fd9ece   postgres:latest                     Up 35 seconds (healthy)                             susshi-chef-db
Access suSSHi Chef
Access suSSHi Chef in your browser at https://127.0.0.1:8443.
suSSHi Chef installs a self-signed certificate to provide HTTPS access, so your browser will show a security warning;
accept it to continue.
Log in with the default user admin and the initial password ChangeMe&1234.
Note
These initial credentials are also printed to the container output when suSSHi Chef starts for the first time, and can be viewed again with docker compose logs susshi-chef.
After logging in, you will land on the Overview Dashboard.
Register a Gateway
Navigate to Partition > Gateways > New:
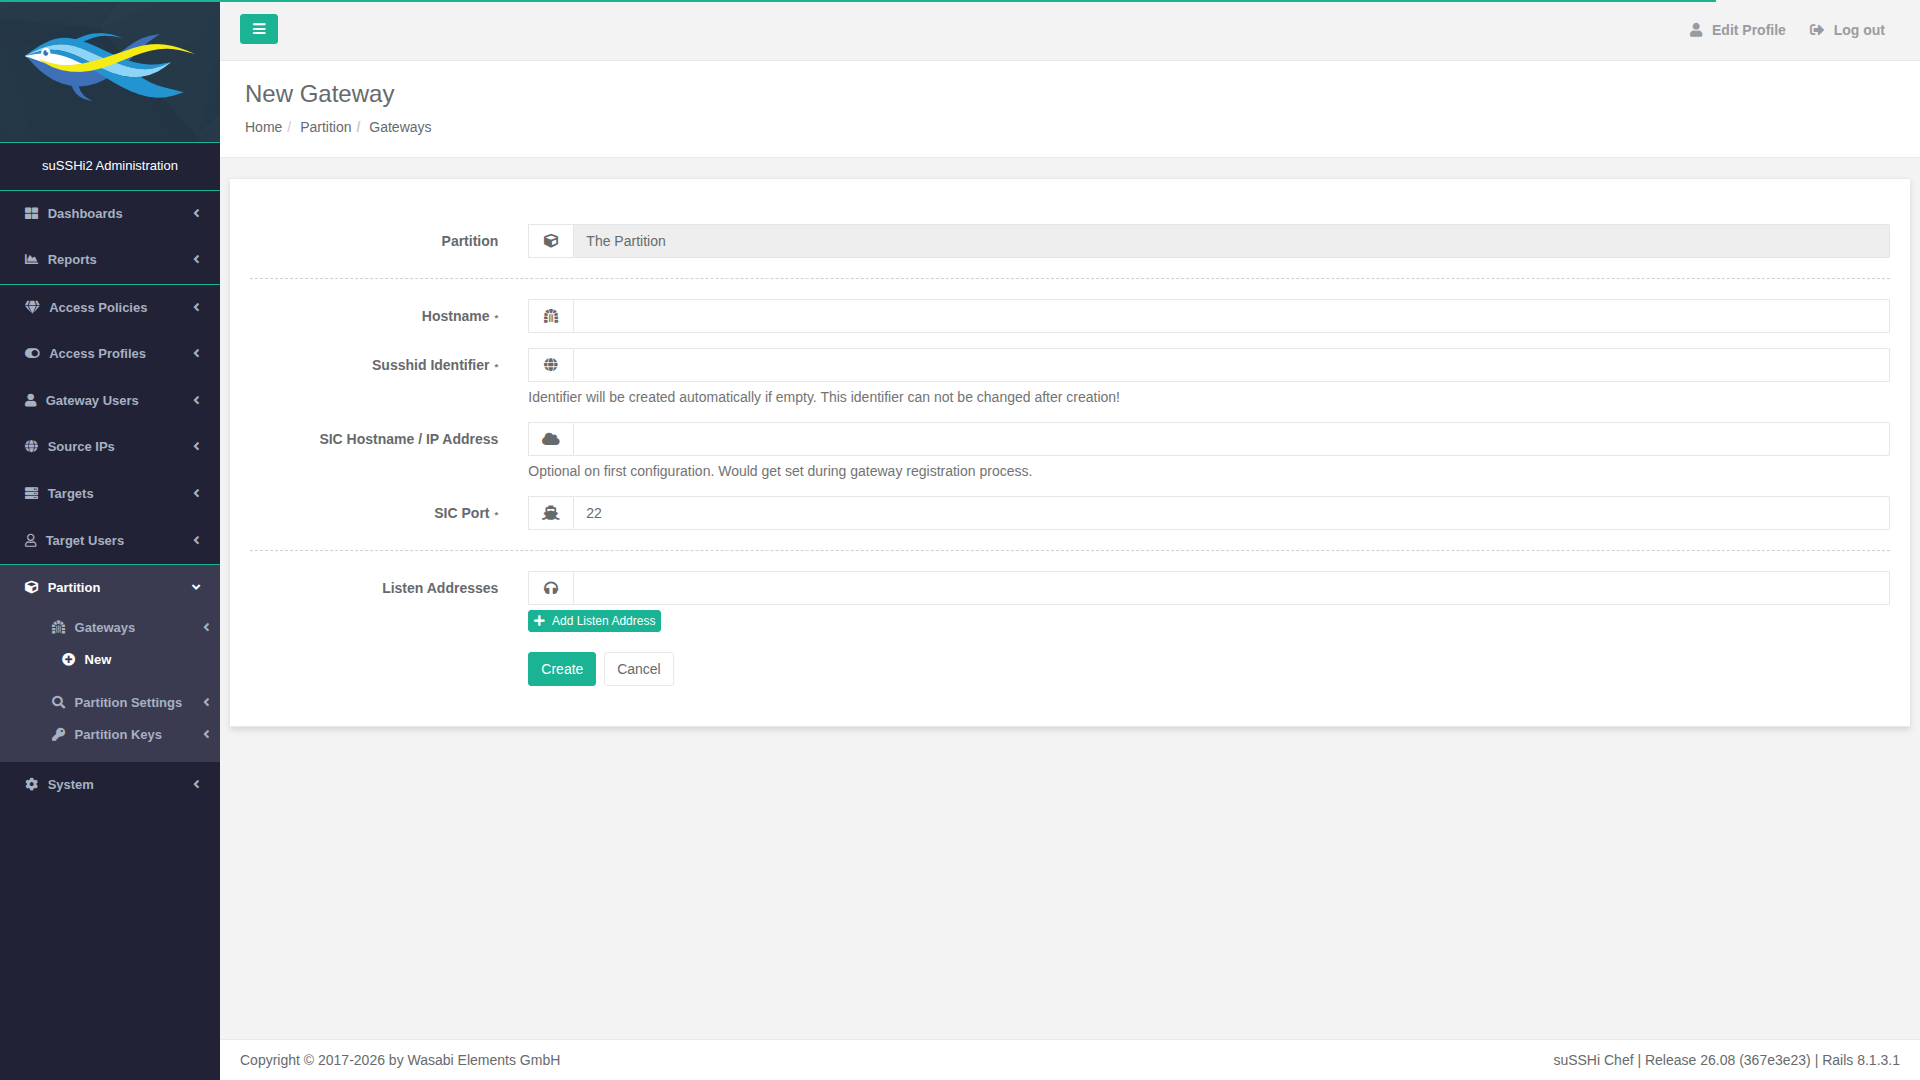
Enter susshi-gateway as the Hostname and click Create.
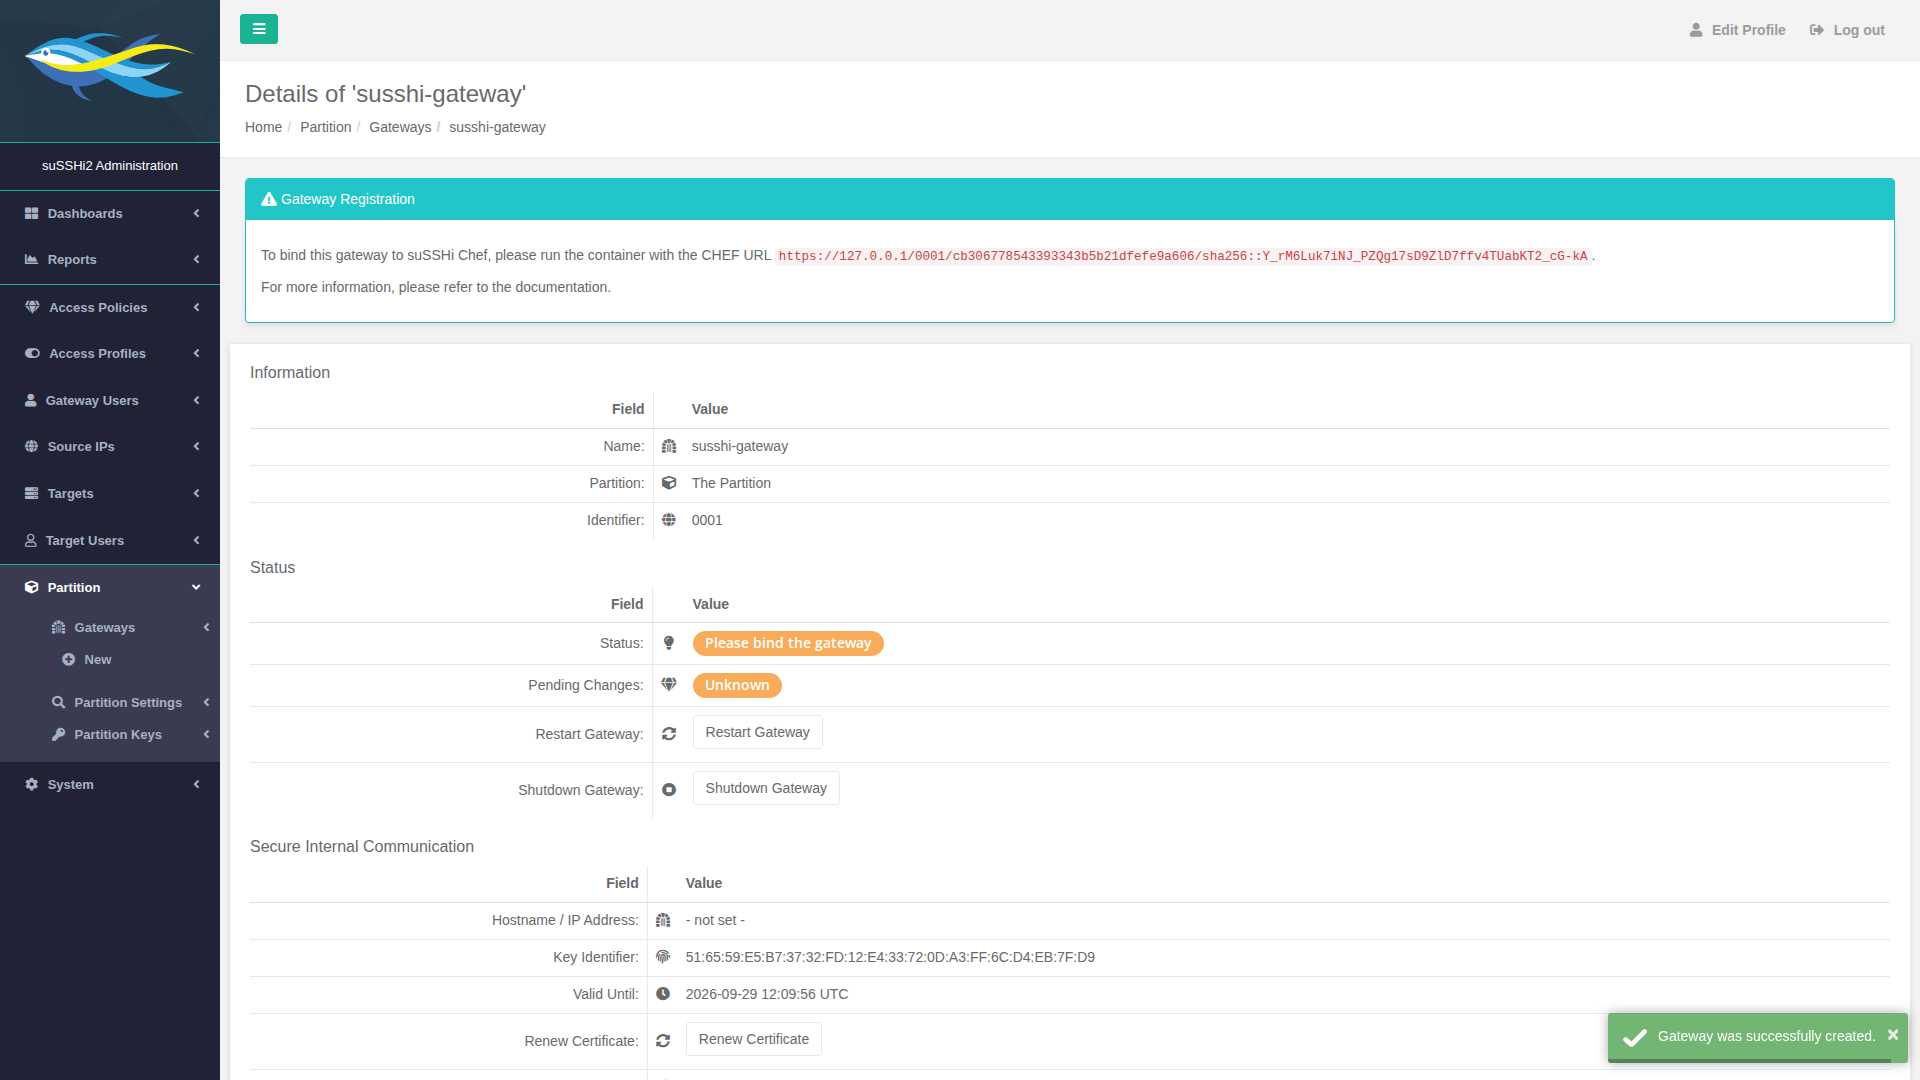
The gateway detail page now shows a Gateway Registration notice containing the CHEF URL for this gateway.
Attention
The host part of the CHEF URL shown above is 127.0.0.1, since this is the address used to access suSSHi
Chef from your browser, outside of the Docker Compose network.
The susshi gateway container, however, reaches suSSHi Chef from inside that network, where 127.0.0.1 refers
to the gateway container itself, not to susshi-chef.
Before adding the URL to your .env file, replace 127.0.0.1 with susshi-chef, the service name from
compose.yaml, so that Docker’s internal DNS can resolve it correctly, for example:
https://susshi-chef/0001/cb306778543393343b5b21dfefe9a606/sha256::Y_rM6Luk7iNJ_PZQg17sD9ZlD7ffv4TUabKT2_cG-kA
This URL is unique to this gateway and is generated once, when the gateway is created.
Copy it into the SUSSHI_CHEF_URL value in your .env file.
Start the Gateway
With SUSSHI_CHEF_URL set in the .env file, the gateway can now be started:
$ docker compose up --detach susshi
Since susshi-chef is already running and healthy, Compose starts susshi immediately.
Monitor its startup with:
susshi  | info  : [00001] (system)  suSSHi2 - susshid version 26.08.0 (Release build) started.
susshi  | info  : [00001] (system)  Initializing Secure Internal Communication (SIC). Gathering gateway information ...
susshi  | info  : [00001] (system)  Waiting for 15 seconds before trying to connect to chef.
susshi  | info  : [00001] (system)  Gateway Chef #1 returned with HTTP code 200.
susshi  | info  : [00001] (system)  Successfully connected to chef.
susshi  | info  : [00001] (system)  SIC initialization completed successfully.
susshi  | info  : [00001] (system)  Gateway Chef #1 returned with HTTP code 200.
susshi  | info  : [00001] (system)  Forked reporting daemon with pid 9
susshi  | info  : [00001] (system)  Forked monitor daemon with pid 10
susshi  | info  : [00010] (system)  HTTP health monitor-server ready for query on http://<hostname>:80
susshi  | info  : [00001] (system)  Forked rsyslog daemon with pid 12
susshi  | info  : [00001] (system)  Listening for new connections on 0.0.0.0 port 22
susshi  | info  : [00001] (system)  Listening for new connections on :: port 22
Once you see Listening for new connections, the gateway is ready to accept SSH sessions.
Create a Gateway User
Navigate to Gateway Users > New User and fill in the following values:
Field |
Value |
|---|---|
Username |
|
Full Name |
|
Public Userkey |
|
Title |
|
Note
These are example values.
Replace johndoe, John Doe, and the public key with the username, full name, and SSH public key of your own
choice.
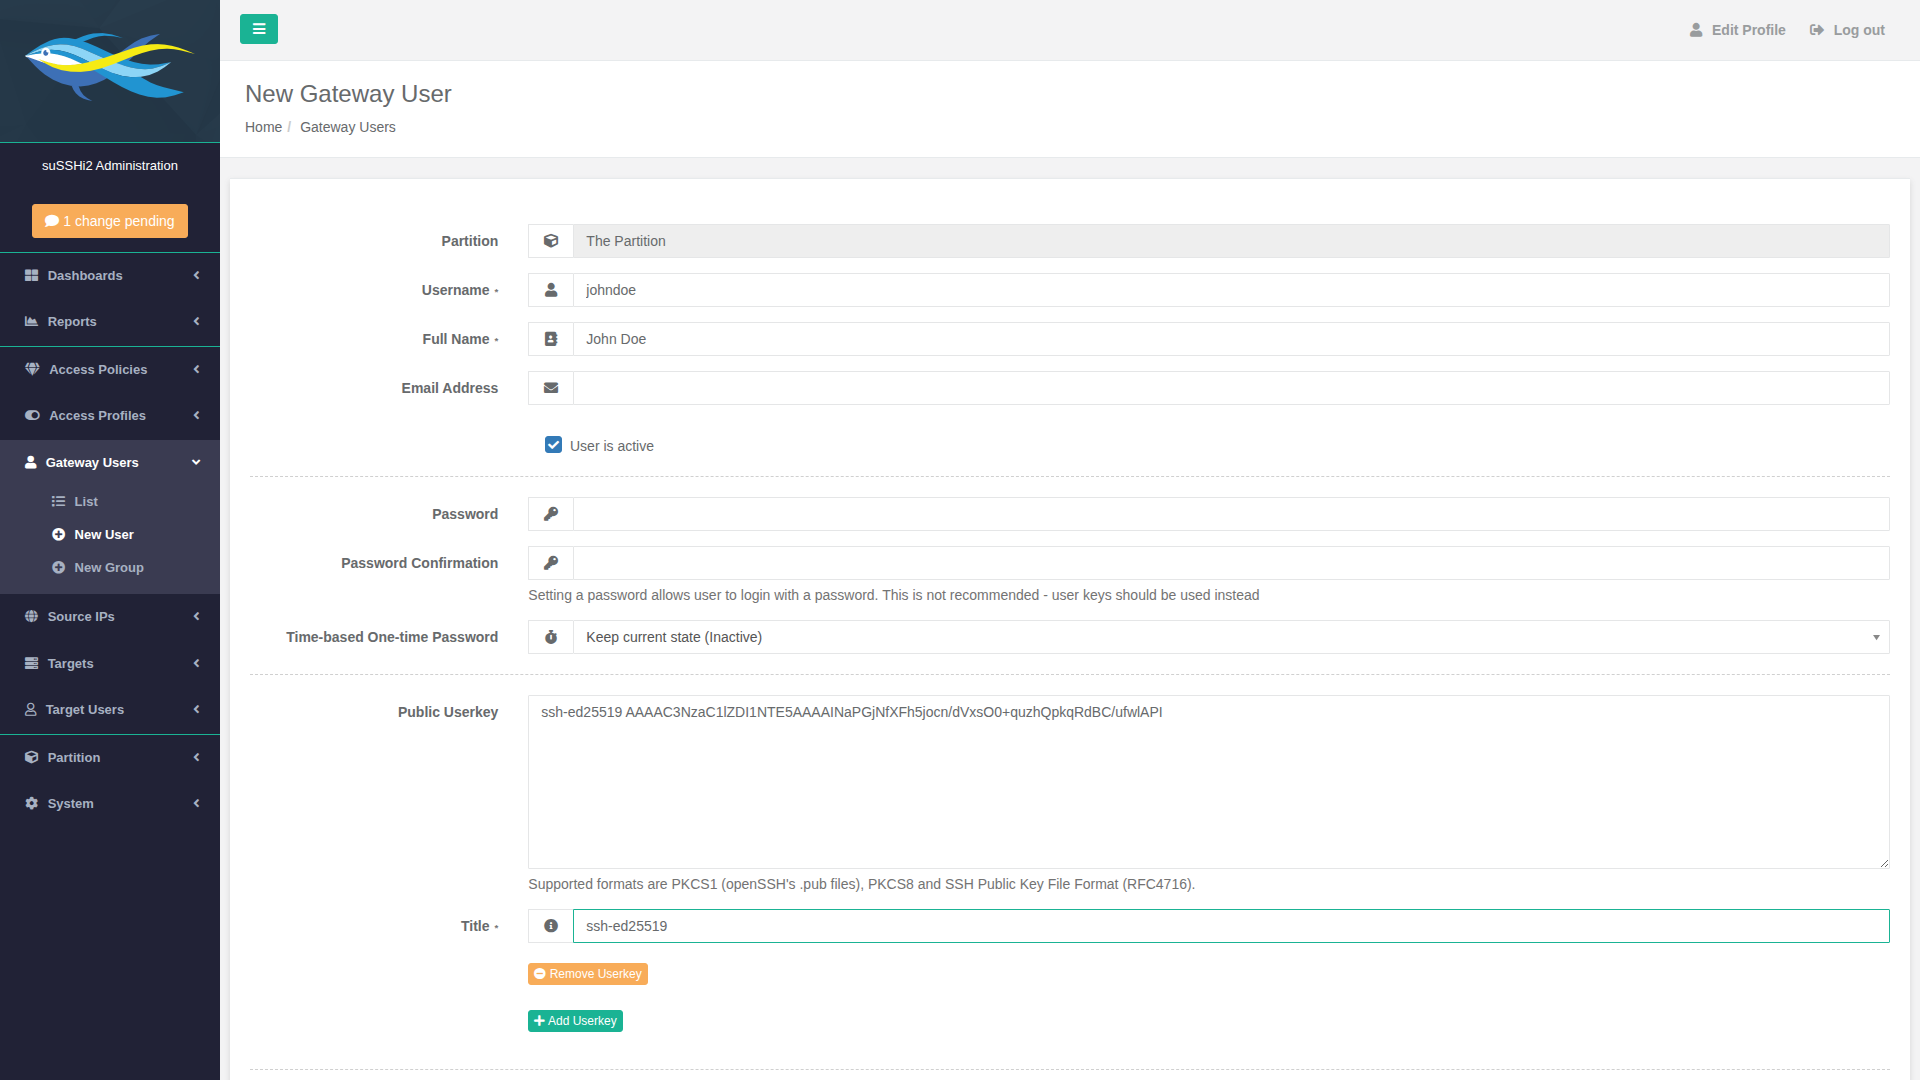
Click Create to save the gateway user.
Create a Target
Navigate to Targets > New Static and fill in the following values:
Field |
Value |
|---|---|
Object Name |
|
IP Address |
the IP address of your target system, for example |
Note
These are example values.
Replace demo-target with an object name of your choice, and 192.168.1.41 with the actual IP address of your
target system.
Click Gather public SSH Hostkey from Target to let the gateway scan and import the target’s public host key:
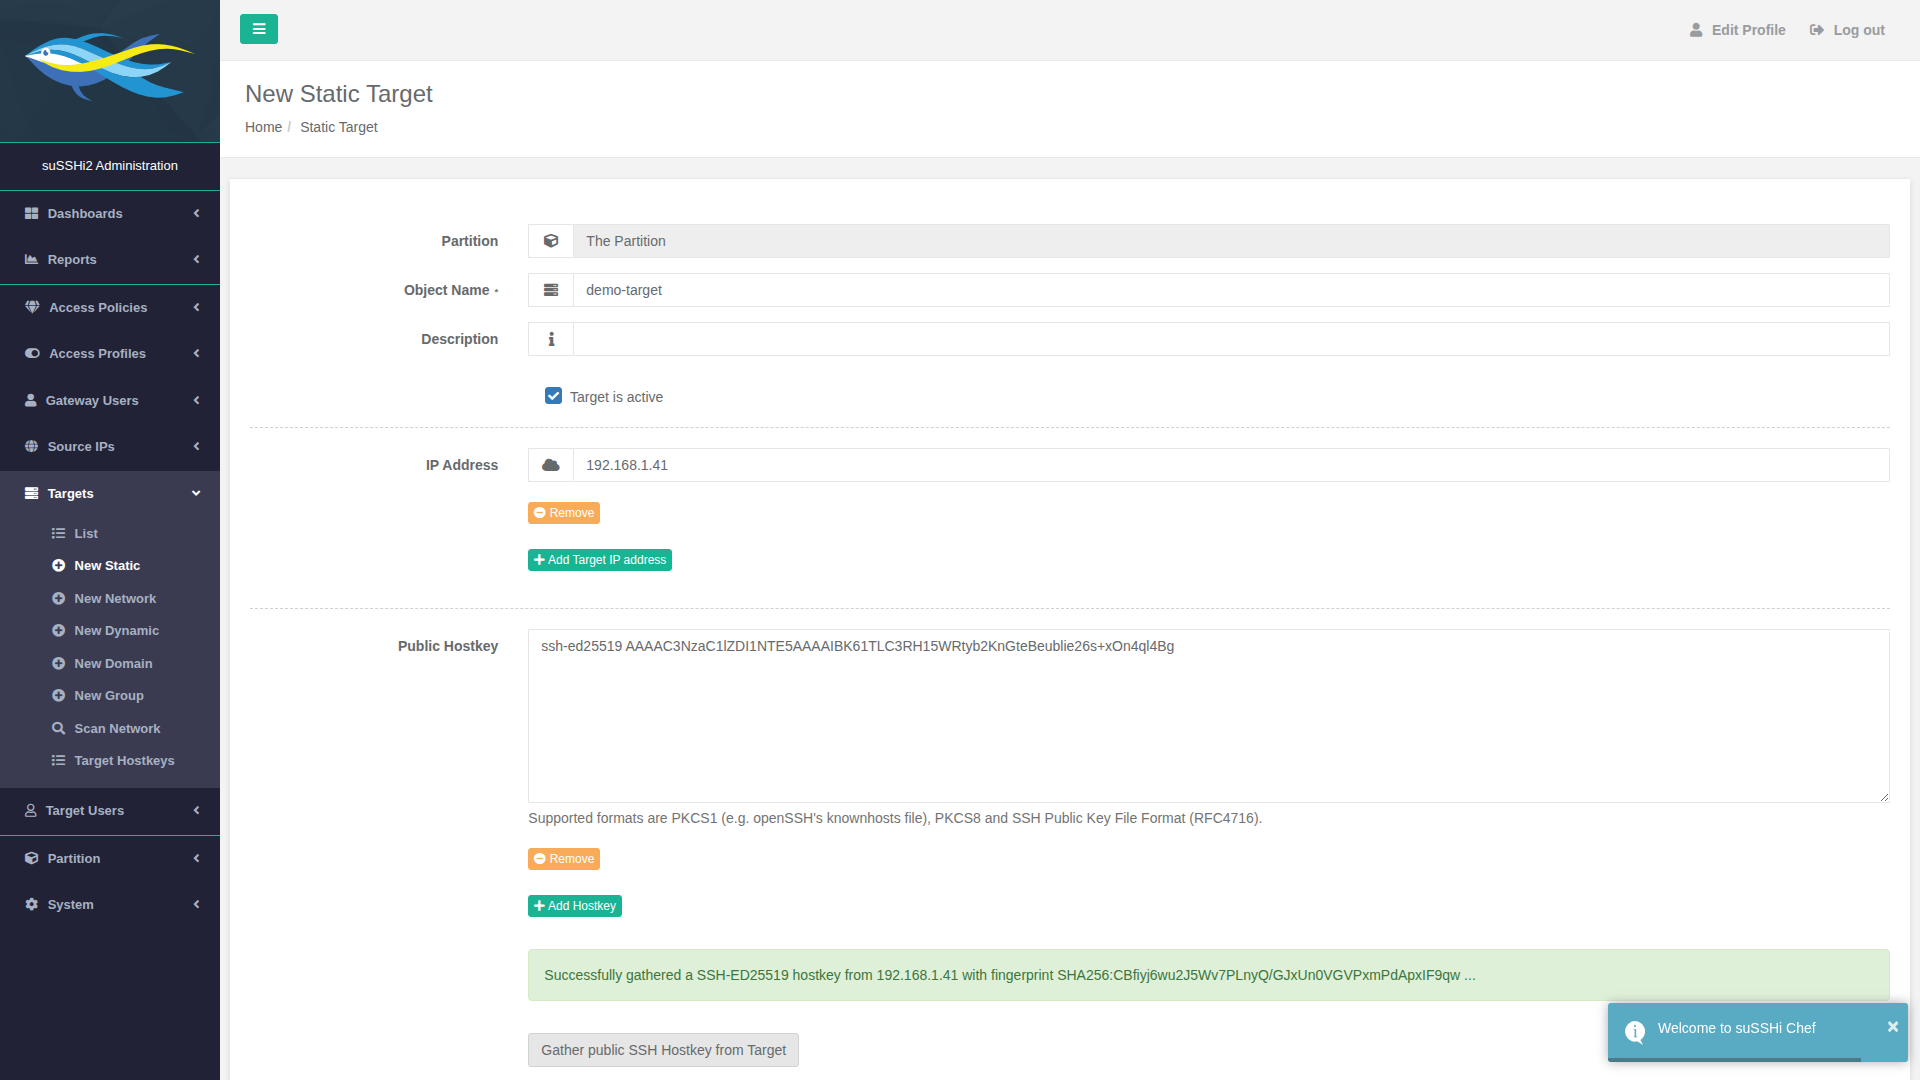
Once the scan succeeds, the public host key is filled in automatically and a confirmation message is shown together with its fingerprint.
Click Create to save the target.
Create an Access Rule
Navigate to Access Policies > New and fill in or select the following values:
Field |
Value |
|---|---|
Policy Title |
|
Source IP Addresses |
|
Gateway Users |
|
Target Users |
|
Targets |
|
Profile |
|
Note
These are example values. Select the gateway user, target user, and target that match your own setup.
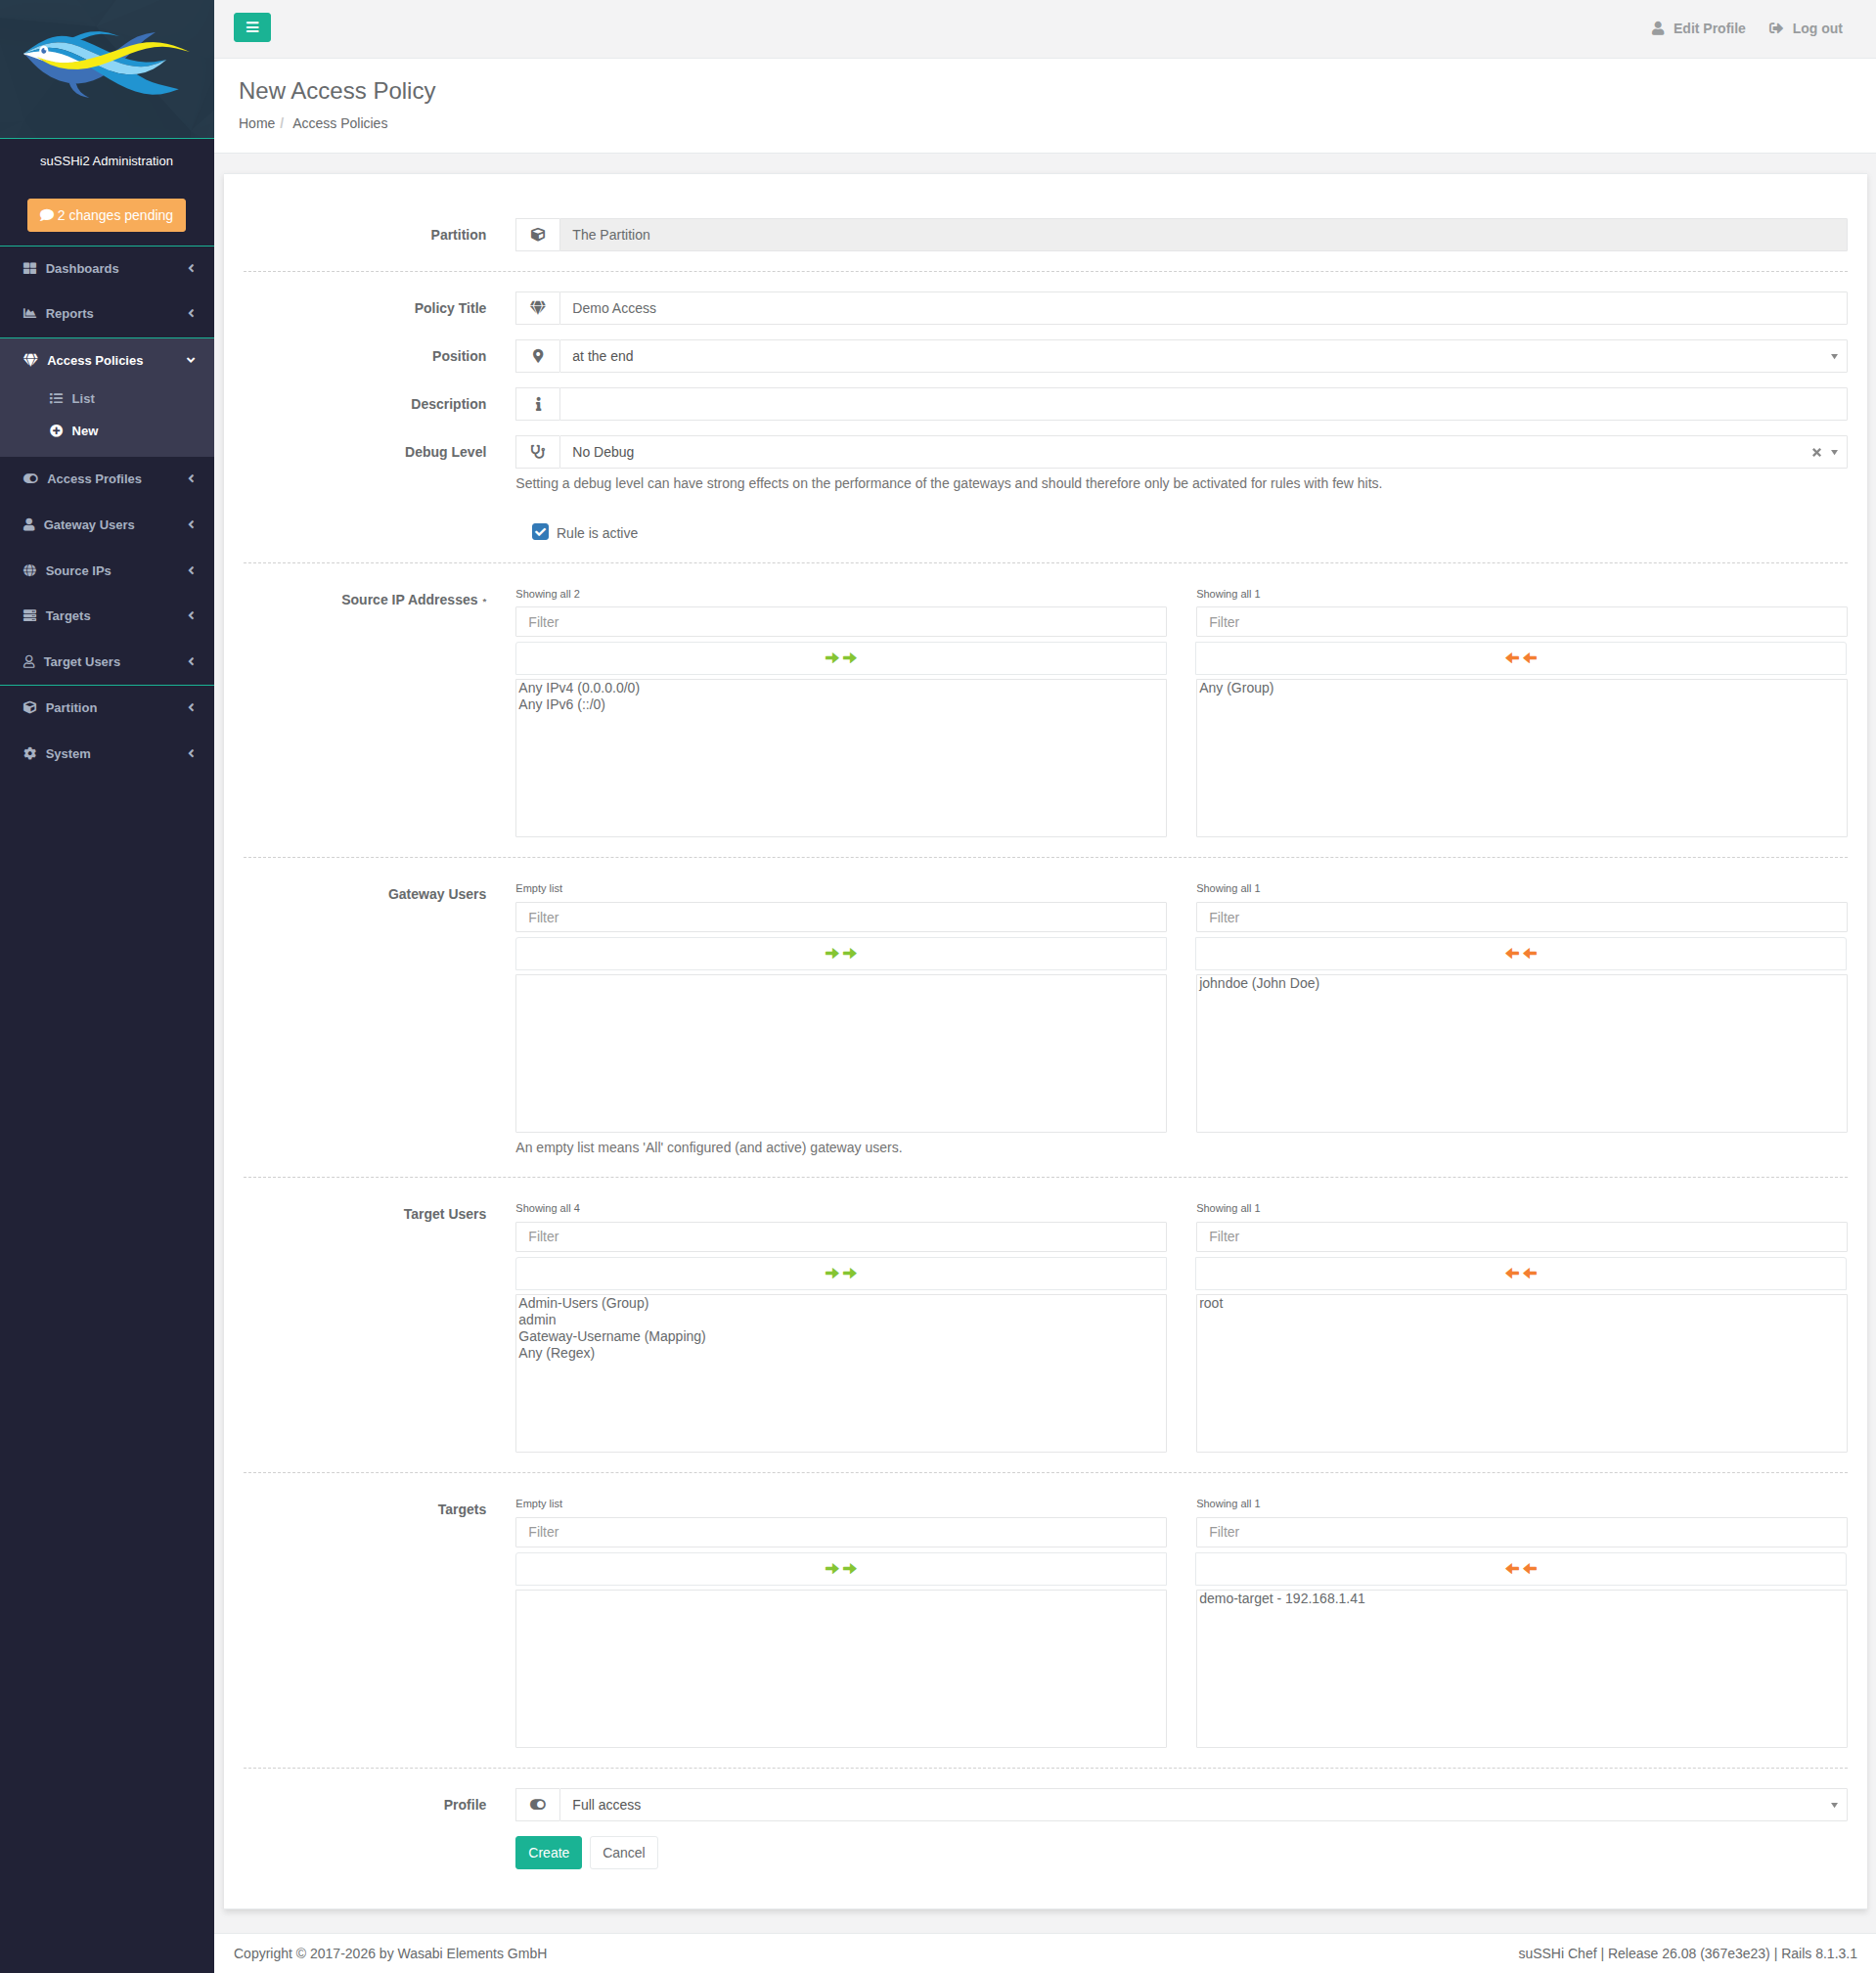
Click Create to save the access rule.
Activate the Changes
Every change made so far is only pending — it is not yet in effect. Click the N changes pending button at the top of the sidebar:
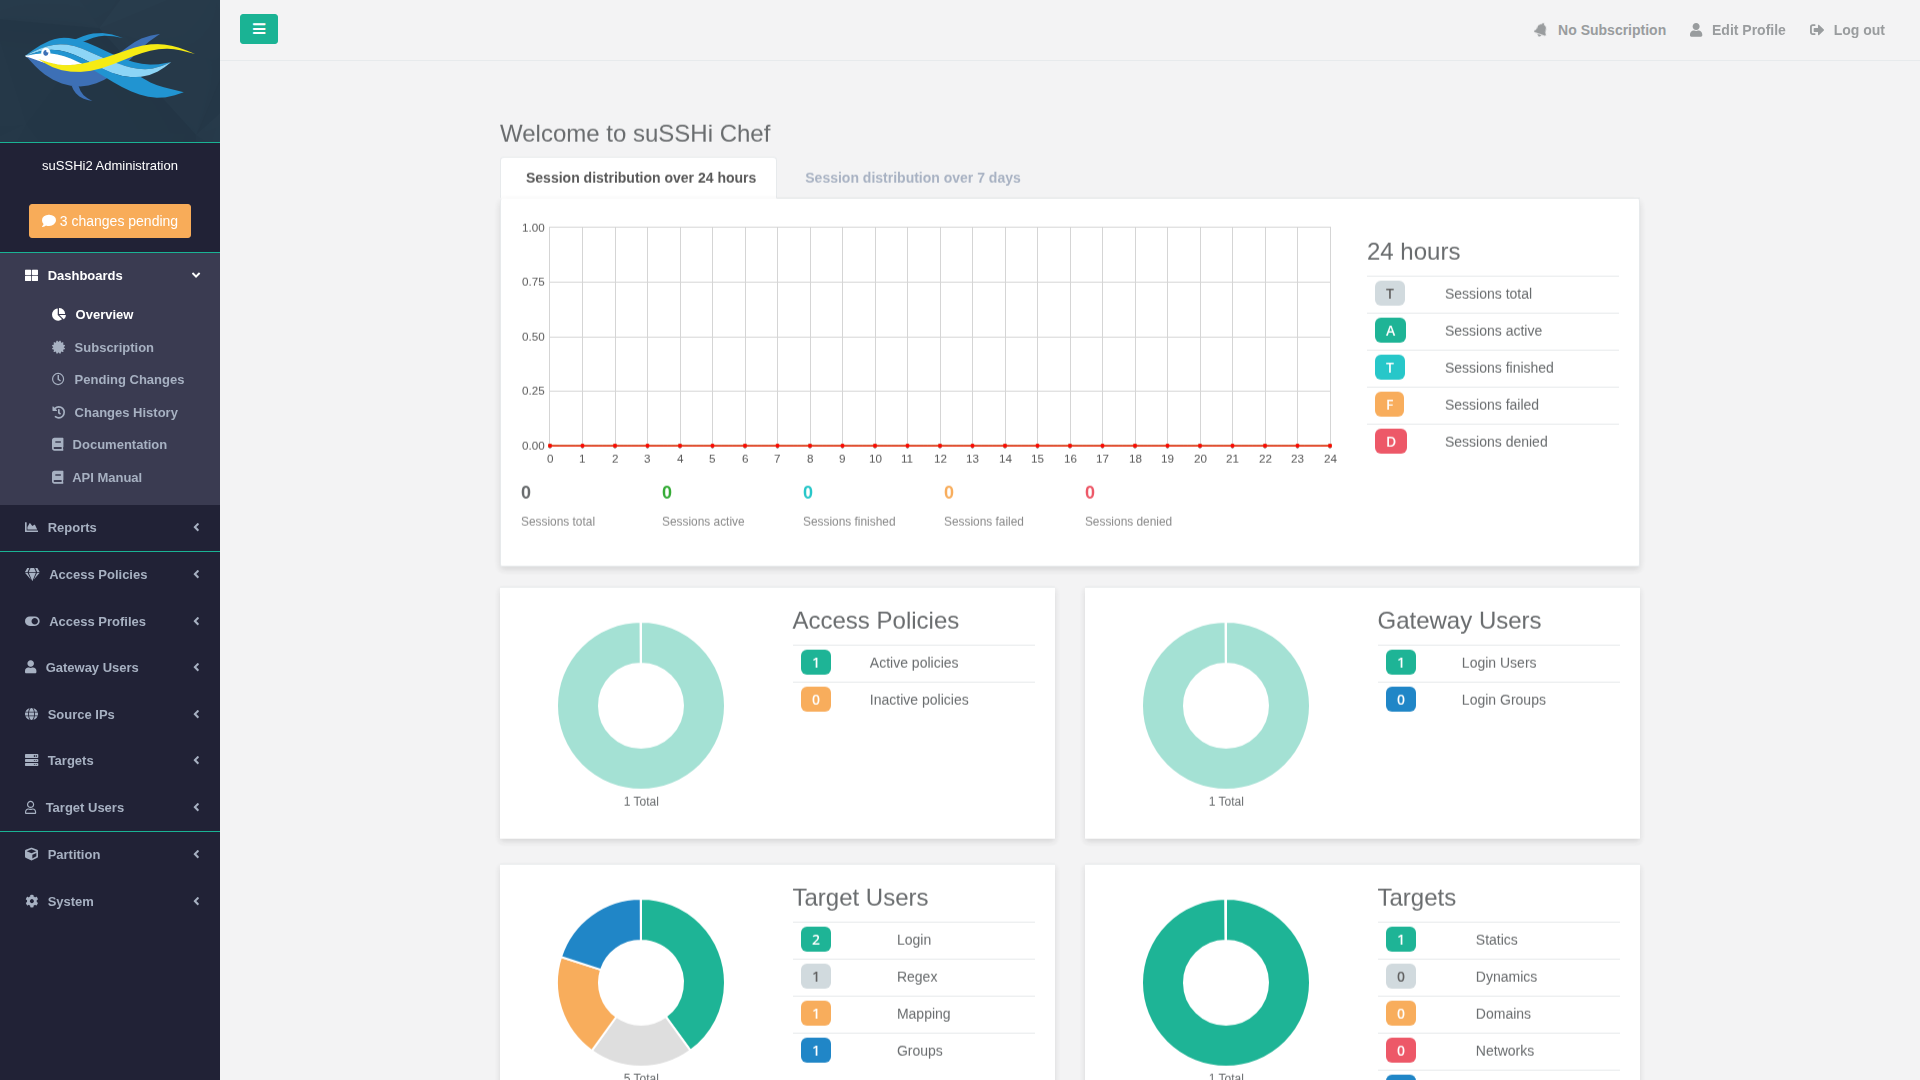
This opens the Pending Changes page, where every pending change can be reviewed:
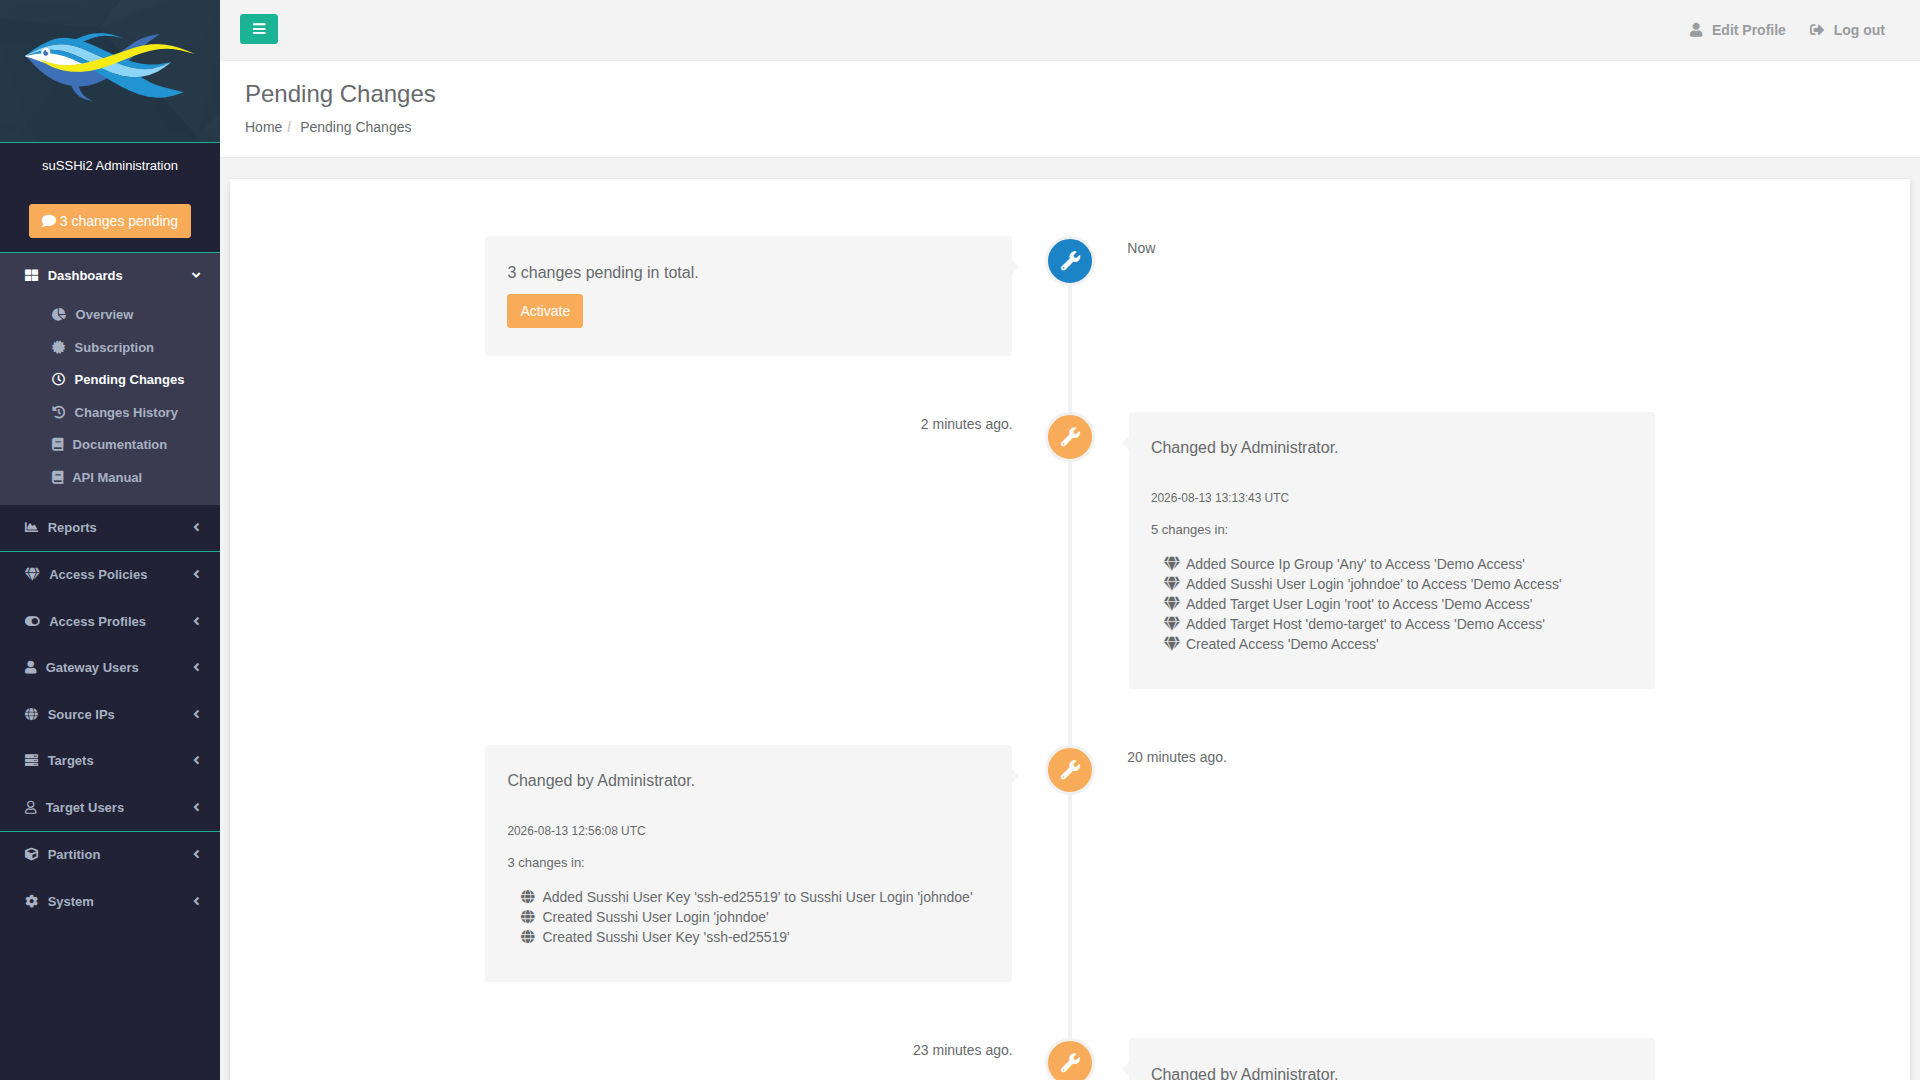
Click Activate, then Confirm in the dialog that follows:
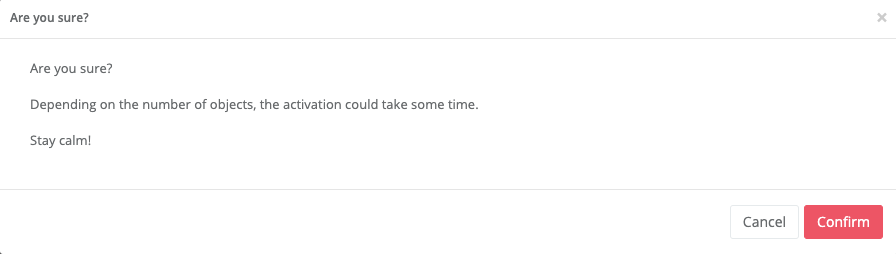
Once activation completes, the page shows No changes pending, and the gateway, target, gateway user, and access
rule are all live.
Export the Gateway Key
In this example, authentication to the target uses public key authentication with the gateway key.
For this to work, at least one of the gateway’s authentication keys must be exported and added to the authorized
keys of the target user on demo-target.
Navigate to Partition > Partition Keys:
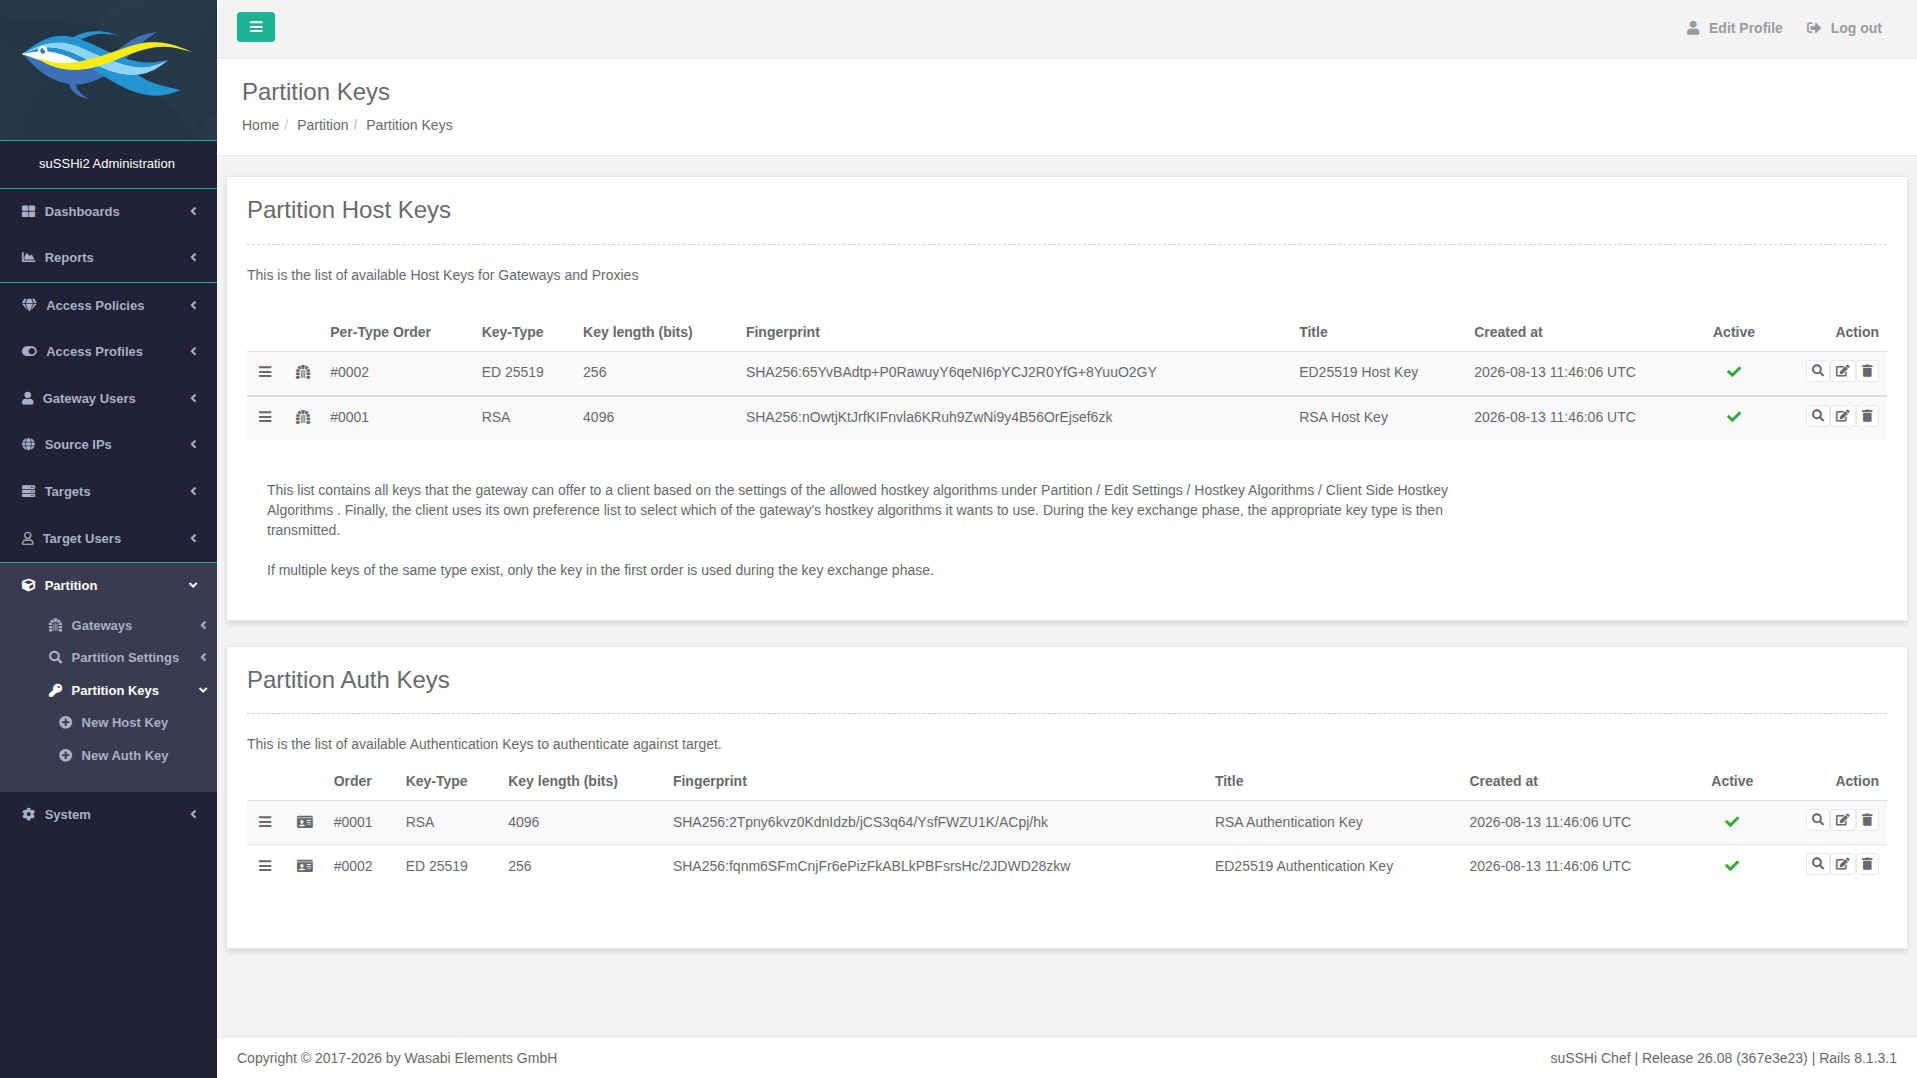
The public key can be downloaded from the show view of the key. Click the magnifying glass icon in the row with fingerprint for at least one of the Partition Auth Keys.
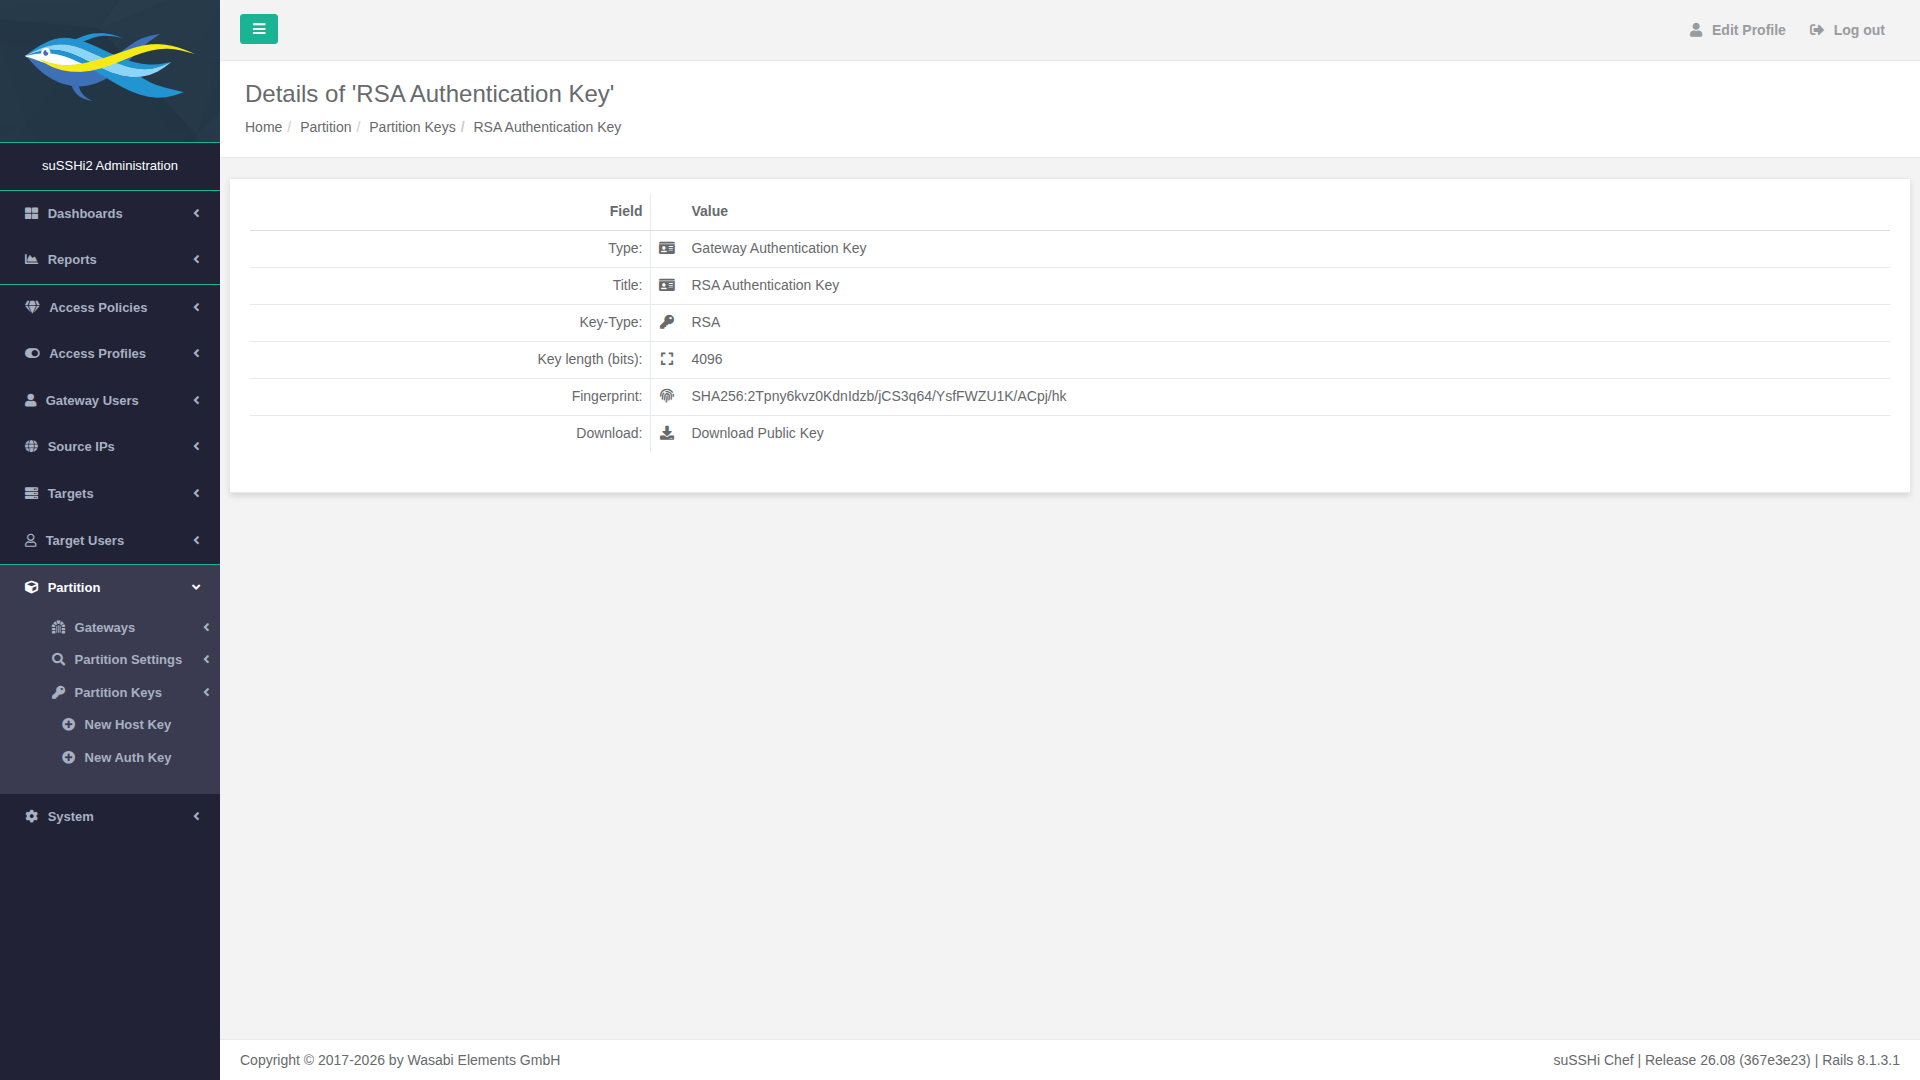
Click Download Public Key and add its content to the target user’s authorized_keys file on demo-target.
Connect via SSH
With the gateway key added to the target, you can now connect through suSSHi:
~> ssh -p 2222 johndoe@root@192.168.1.41@127.0.0.1
The authenticity of host '[127.0.0.1]:2222 ([127.0.0.1]:2222)' can't be established.
ED25519 key fingerprint is SHA256:65YvBAdtp+P0RawuyY6qeNI6pYCJ2R0YfG+8YuuO2GY.
This key is not known by any other names.
Are you sure you want to continue connecting (yes/no/[fingerprint])? yes
Warning: Permanently added '[127.0.0.1]:2222' (ED25519) to the list of known hosts.
Welcome to suSSHi2 Gateway
Welcome to Ubuntu 24.04.4 LTS (GNU/Linux 7.0.2-3-pve x86_64)

 * Documentation:  https://help.ubuntu.com
 * Management:     https://landscape.canonical.com
 * Support:        https://ubuntu.com/pro
Last login: Thu Aug 13 15:22:51 2026 from 192.168.1.114
root@docker-app-011:~# exit
The username is composed of the gateway user, the target user, and the target, separated by @ — here johndoe@root@192.168.1.41.
The host key fingerprint shown on first connection matches the gateway’s ED25519 host key, and the login banner
confirms that the session was established through suSSHi Gateway before reaching demo-target.
View the Session Report
The successful session can now be reviewed under Reports:
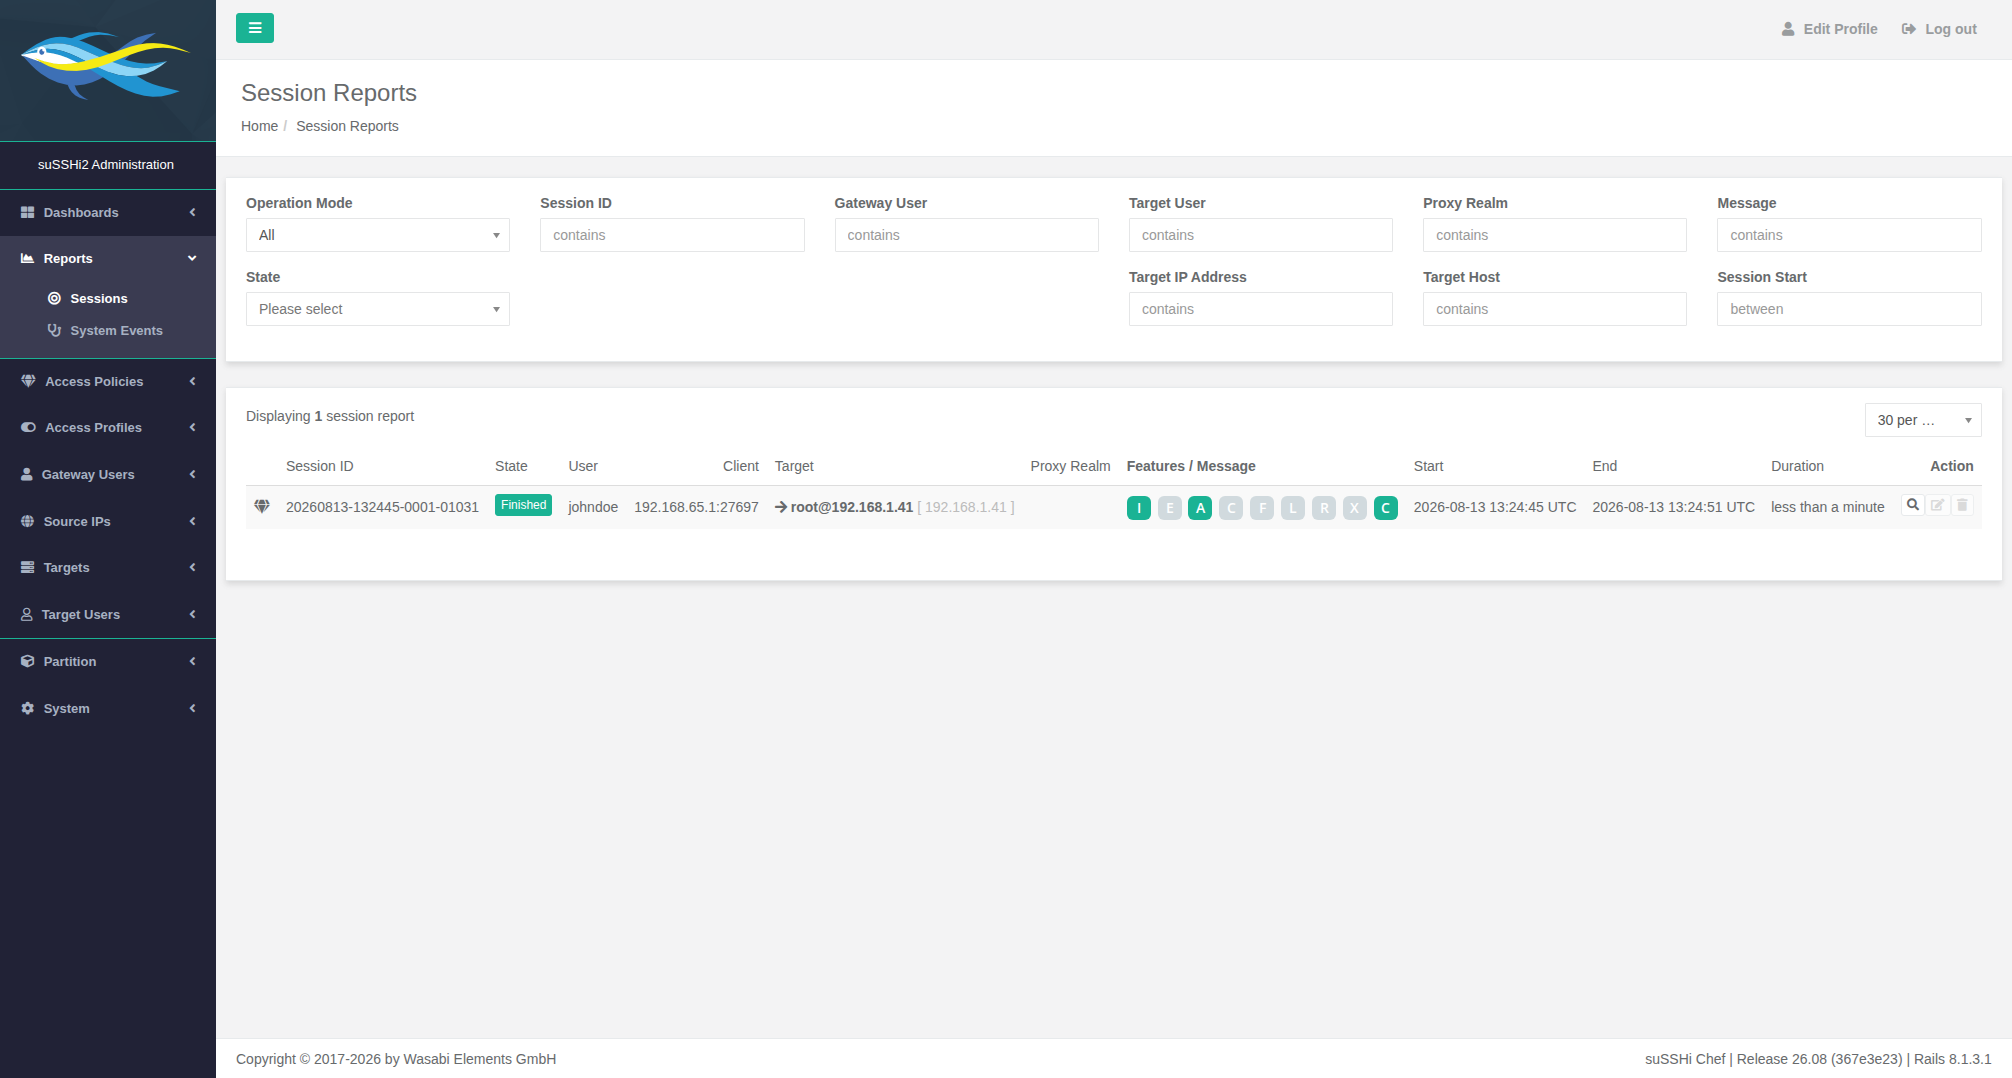
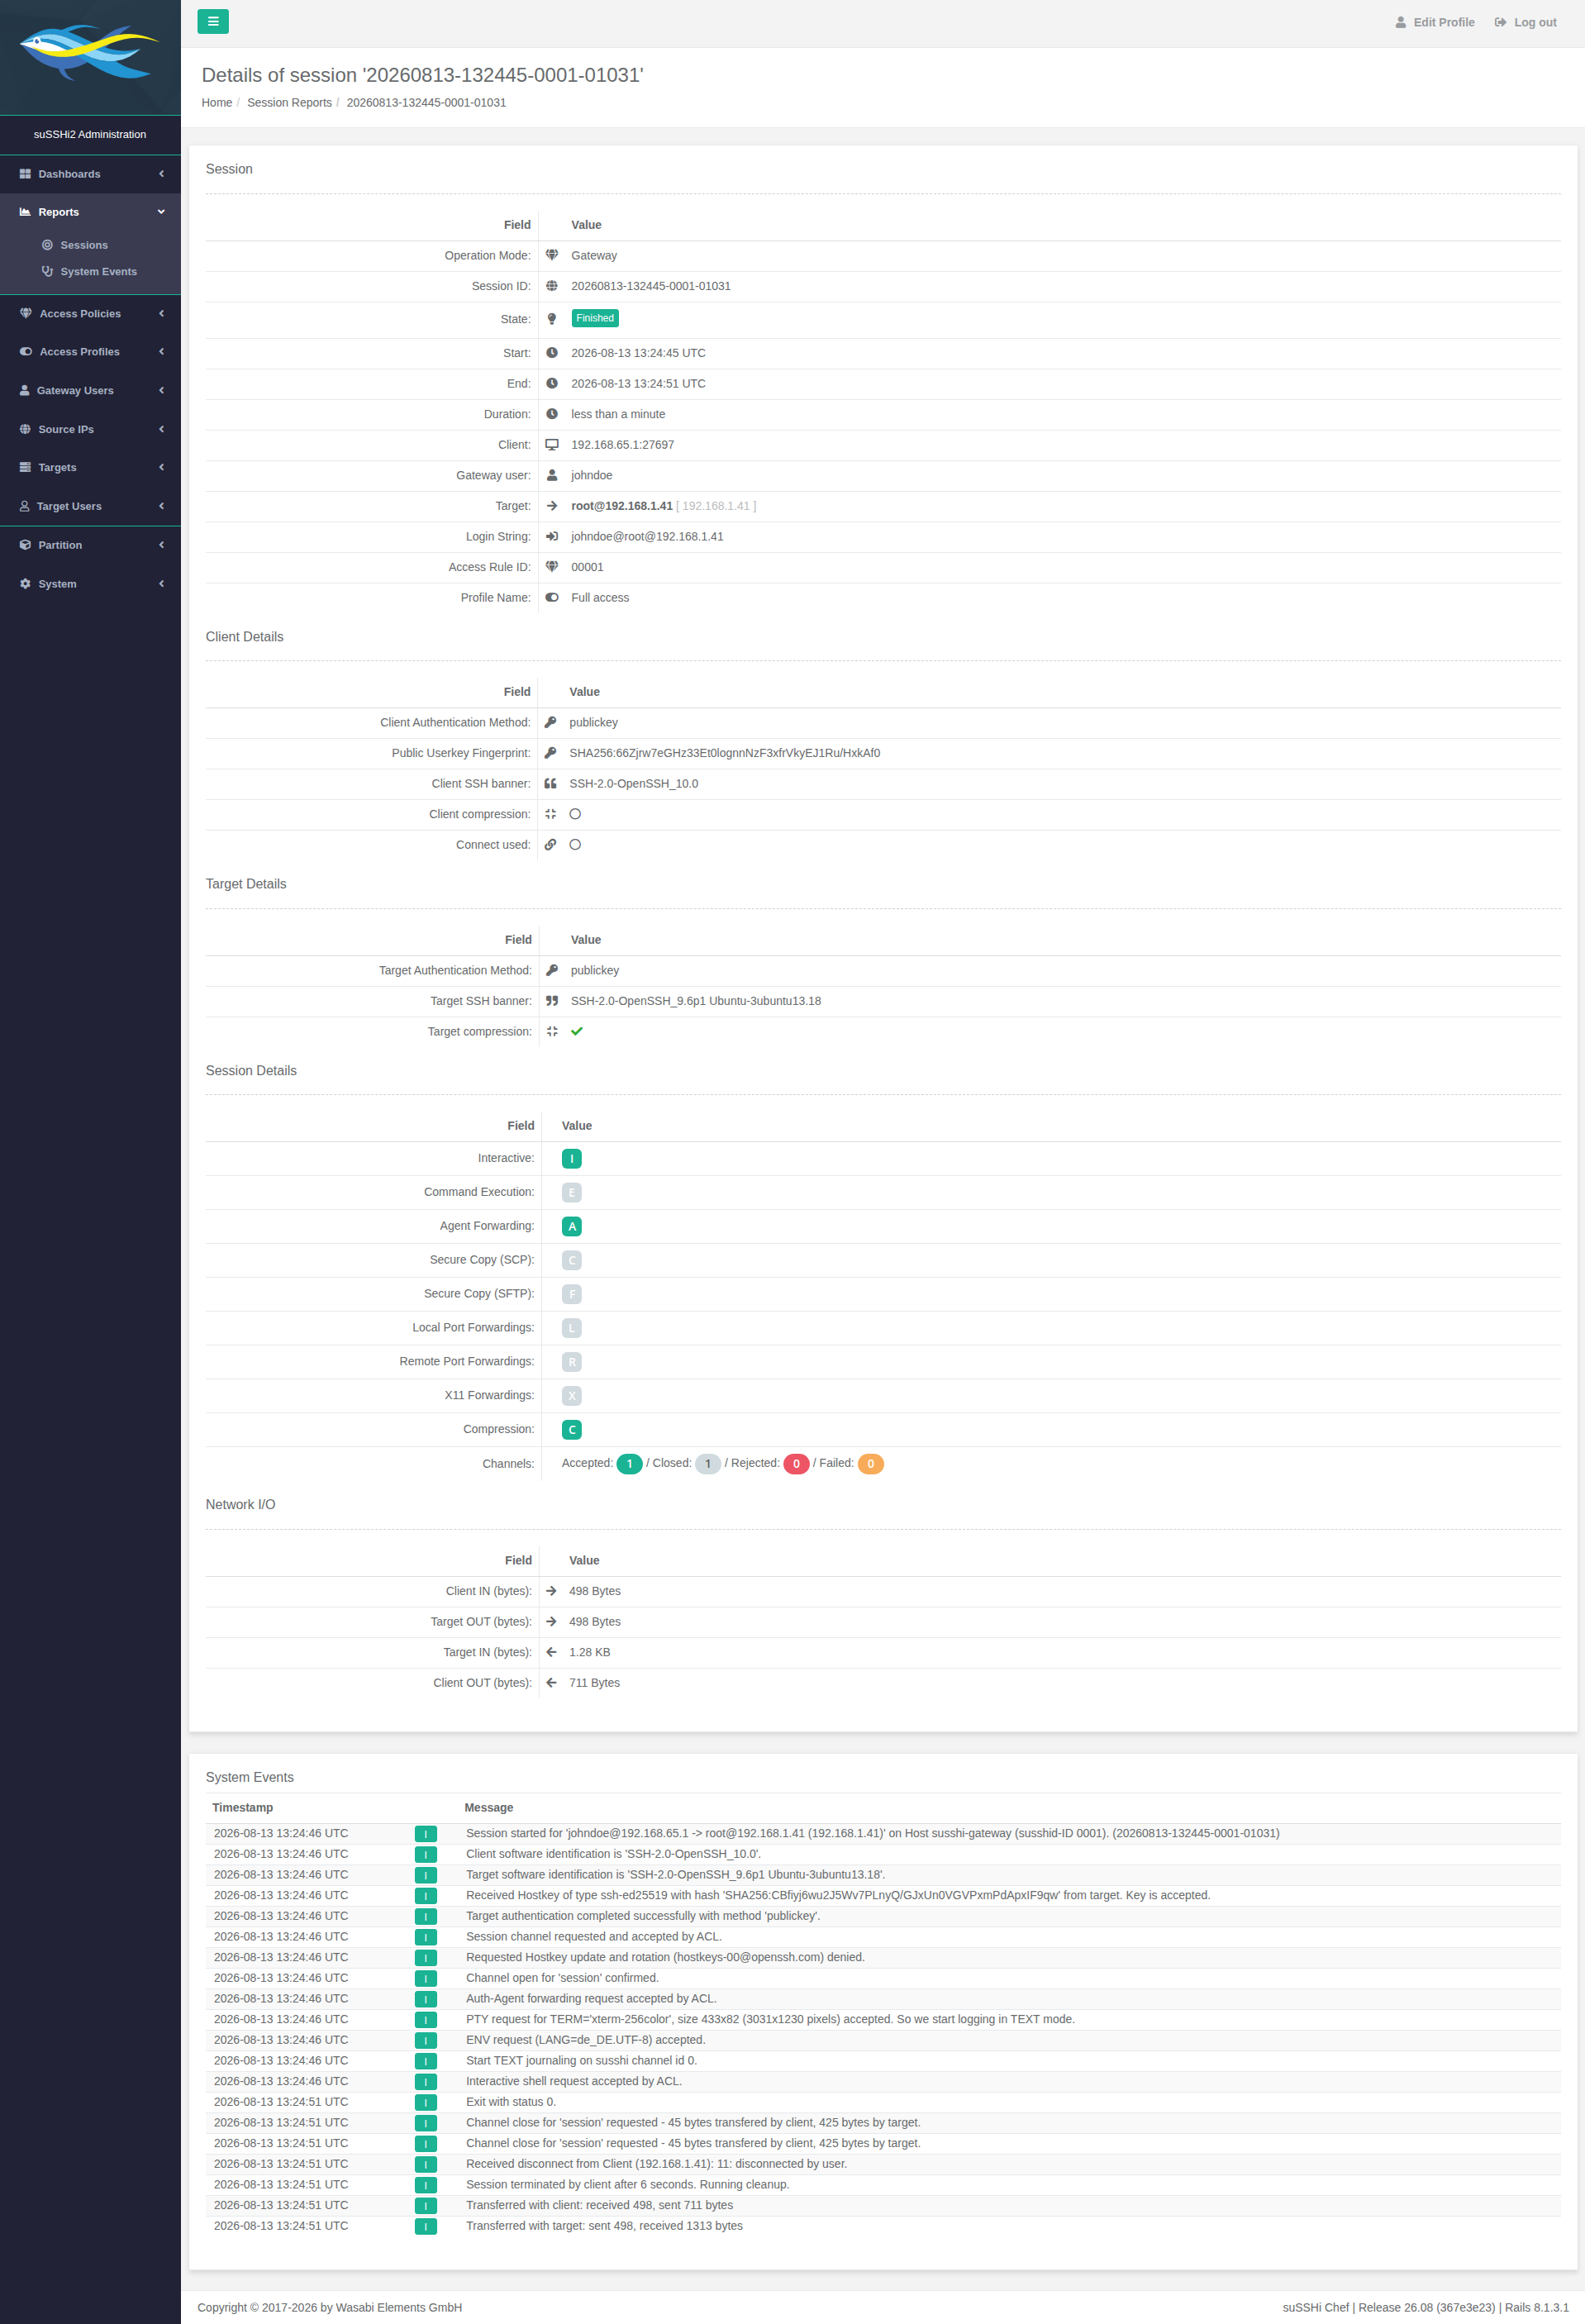
Opening the report shows the full session details, including client and target authentication methods, session features, network I/O, and a timeline of system events: